Zalo
Overview
In this guide, we'll go through how to integrate your AI Assistant into Zalo. Here's an overview of what we'll cover:
- Prerequisites
- Connecting your AI Assistant to Messenger
Prerequisites
To connect Zalo with DxConnect, you will need:
- a verified Zalo Official Account(ZOA) verified. If you do not have a Zalo Official Account, you can refer here
- The use package of Zalo Official Account supports the Official Account API. Accounts that have not registered for a package or are using the default package will not be able to use the functions of the Official Account API. Refer to the package information here.
Connect your AI Assistant to Messenger
Step 1: Create Zalo App.
To connect the AI Assistant with ZOA, you’ll need a Zalo App. For that, go to Zalo for Developers (must log in with Zalo Official Account(ZOA))
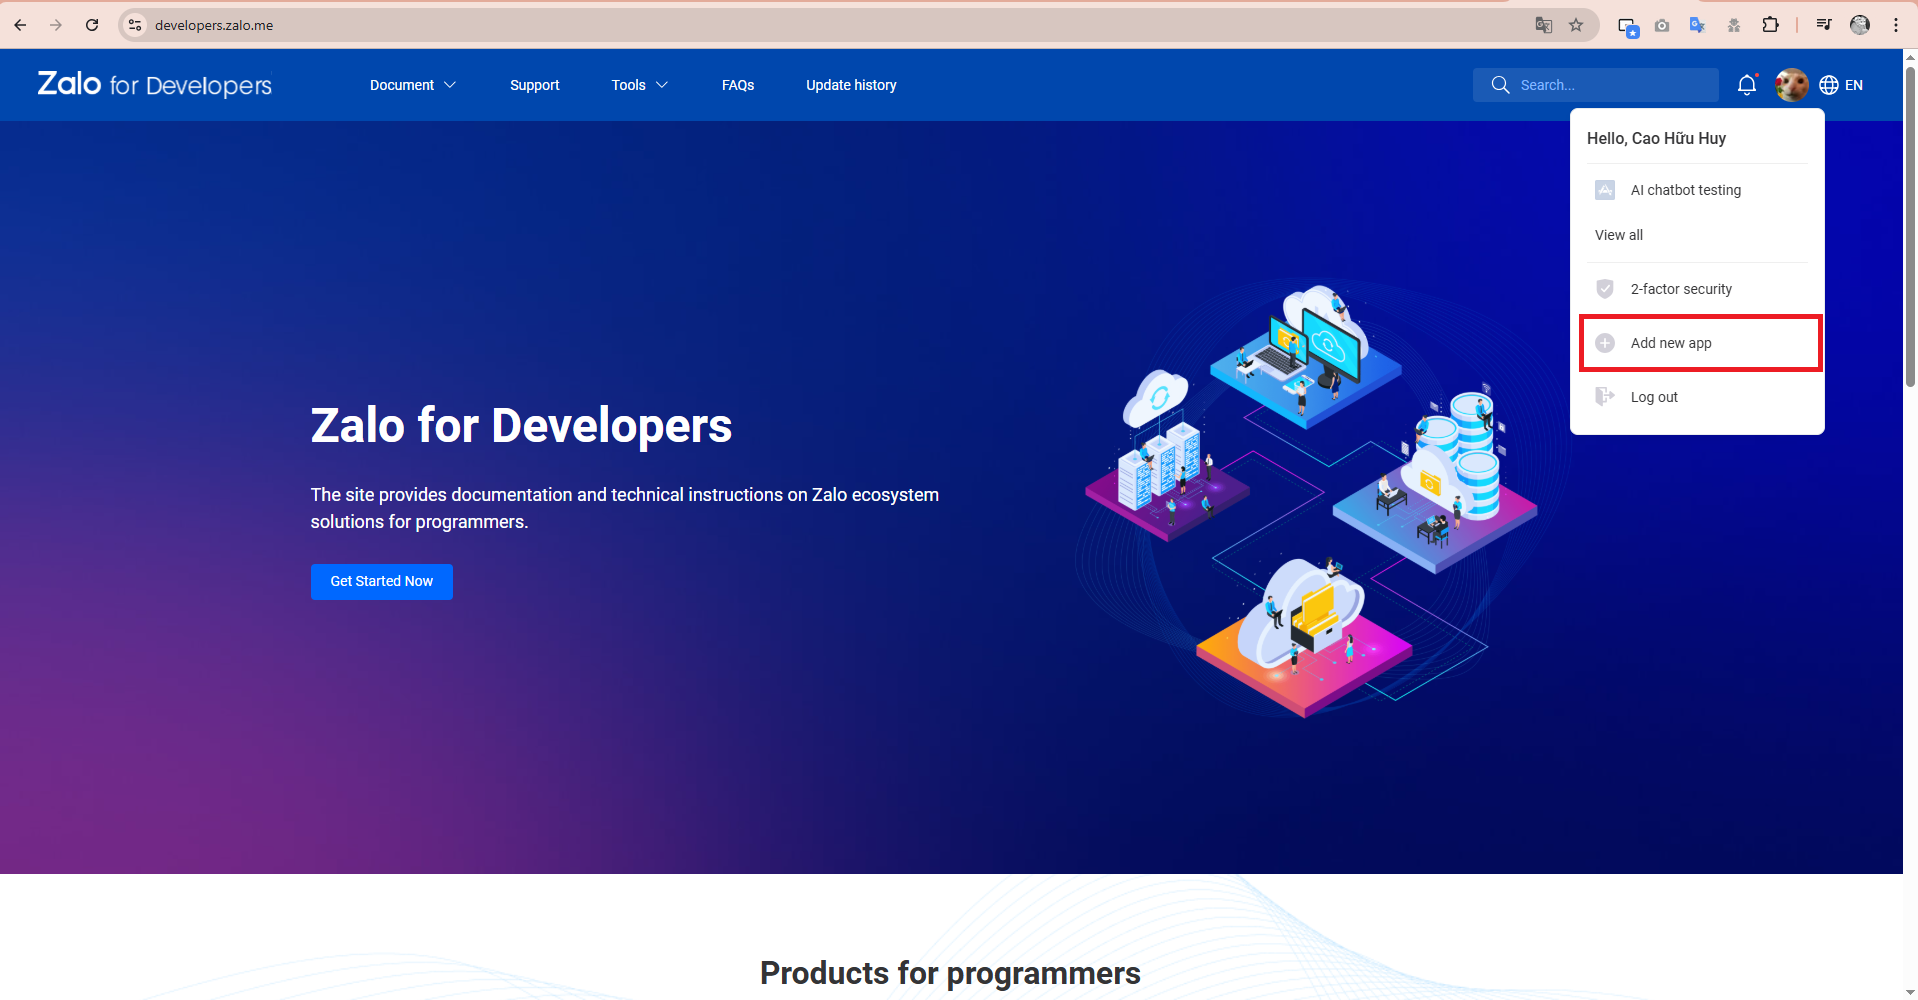
Click on “Create App”.
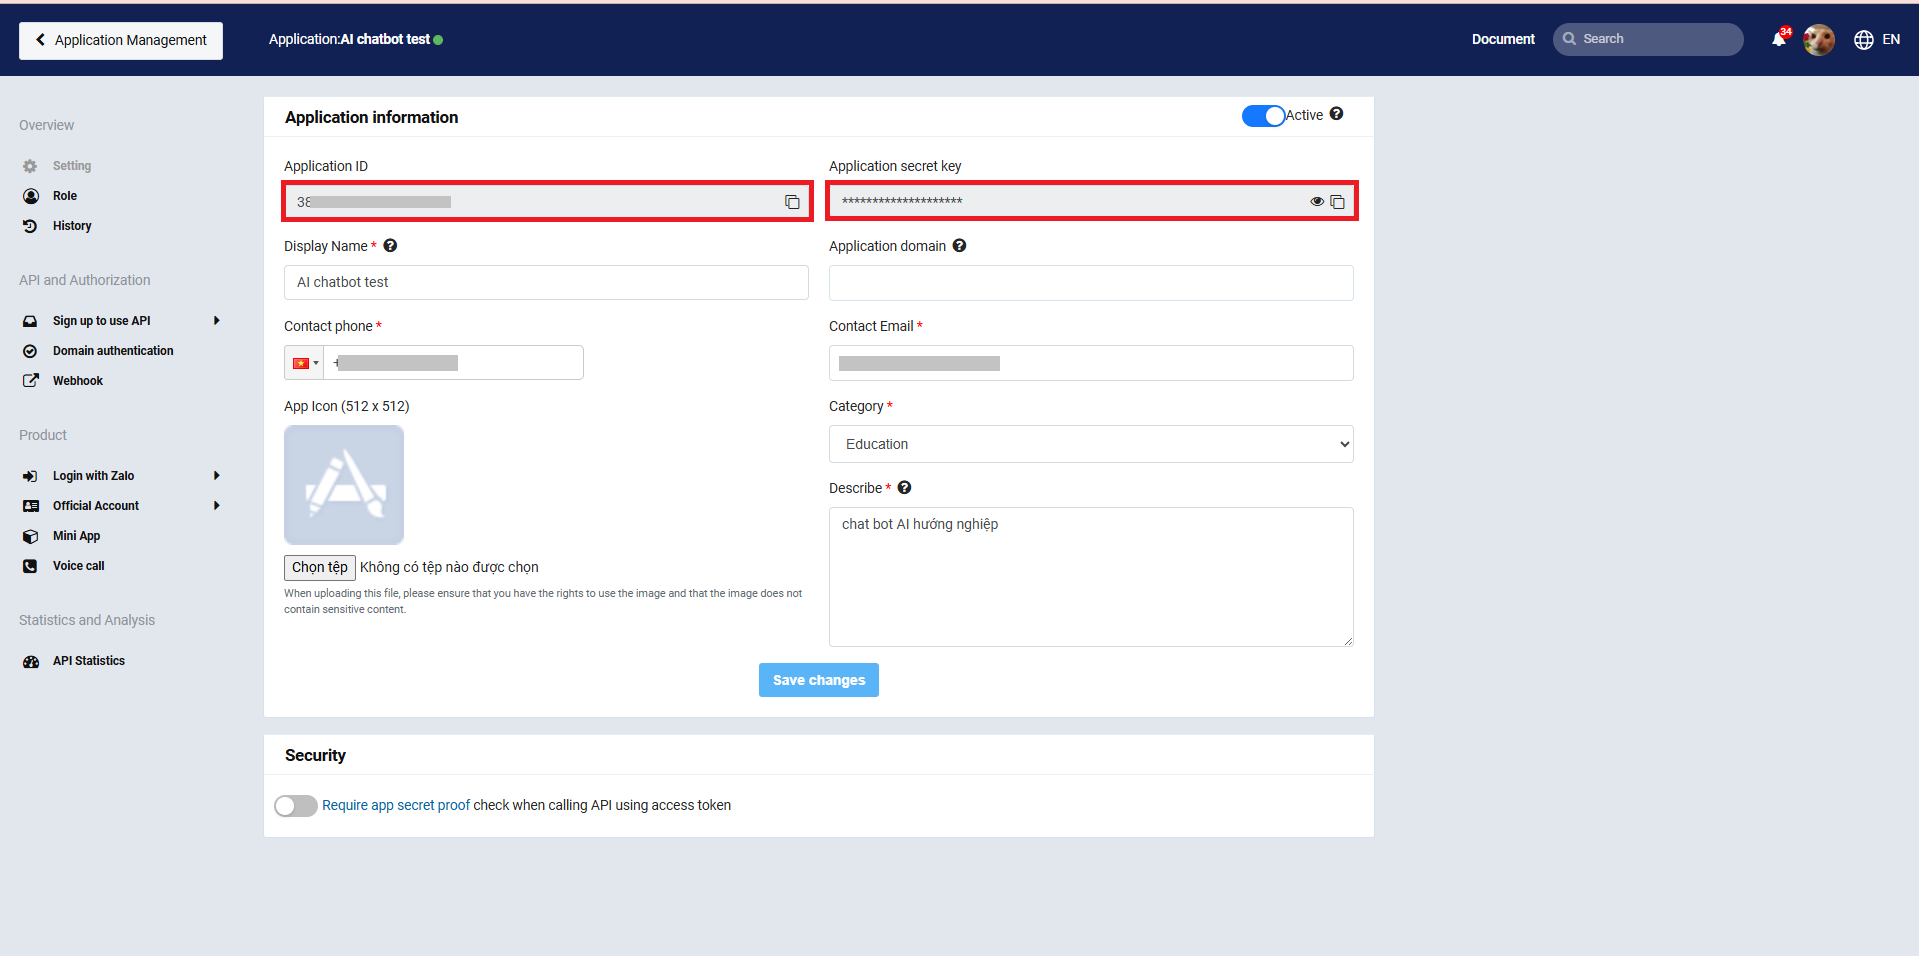
After successful creation, access the newly created app, which has an interface as shown above, and save the information including: (Application ID) and (Application Secret Key). These will be used to connect the Zalo App with Dxconnect.
Step 2: Sign up to use API for Official Account.
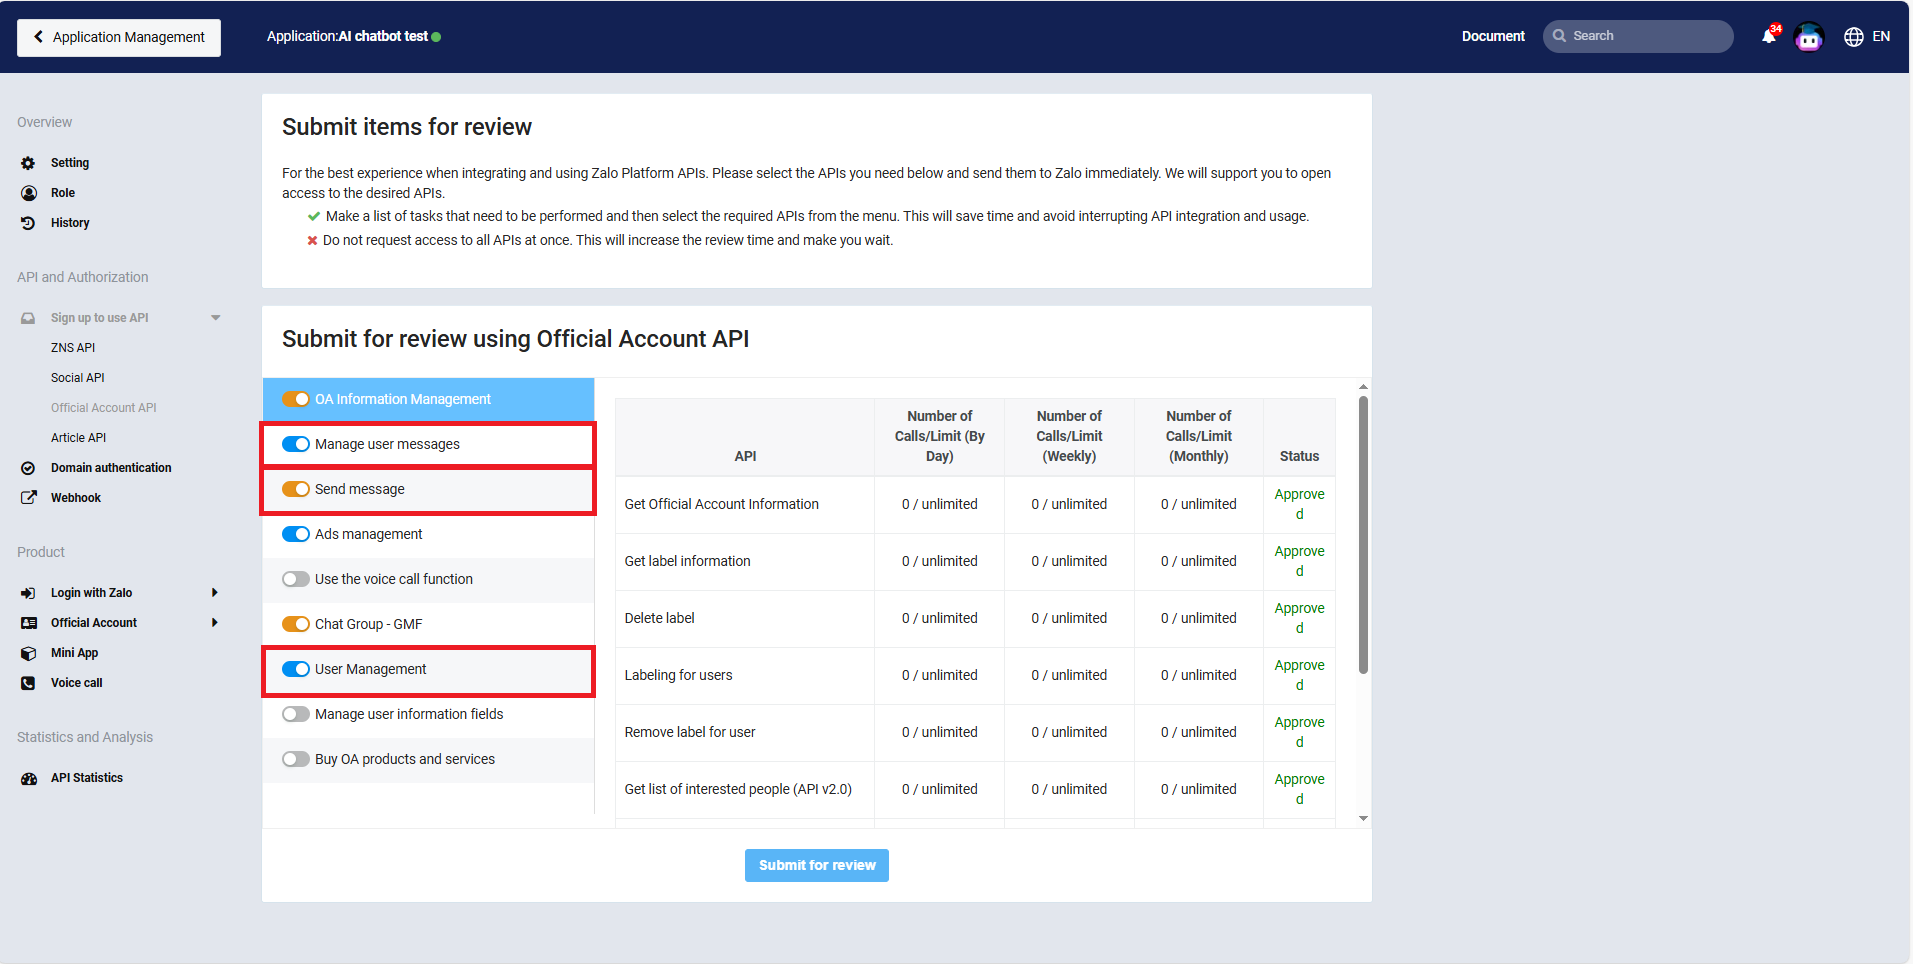
Register to use the necessary APIs for the Official Account API, including: Manage user messages, Send message, and User Management.
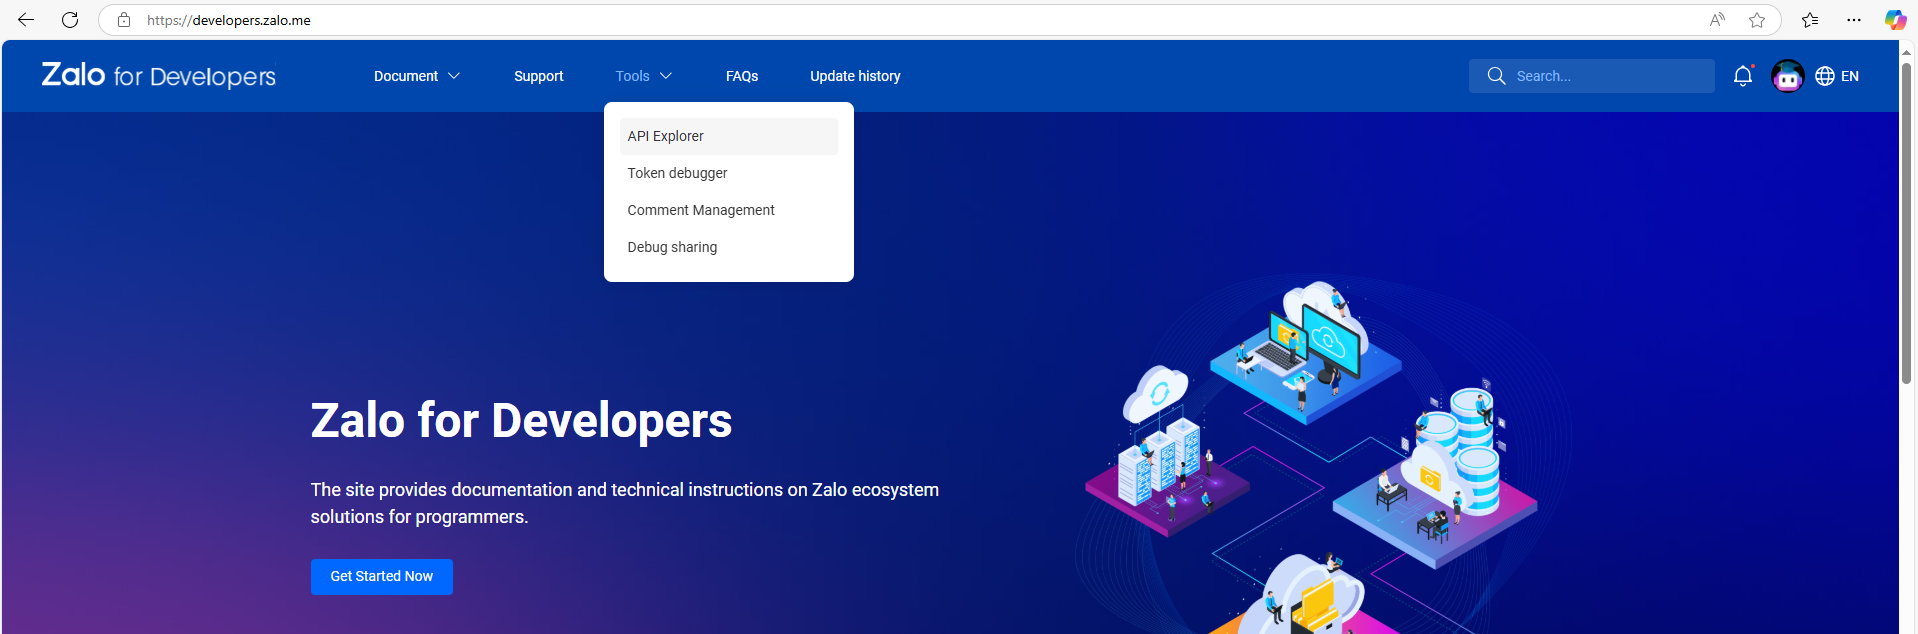
Step 3: Use API explorer for Connect Zalo Official Account to Zalo App.
Firstly, go to API Explorer in Zalo developer link
secondly, select the Access Token type as OA Access Token, choose the application created in the previous step, and select the OA account you want to link to the Zalo App.
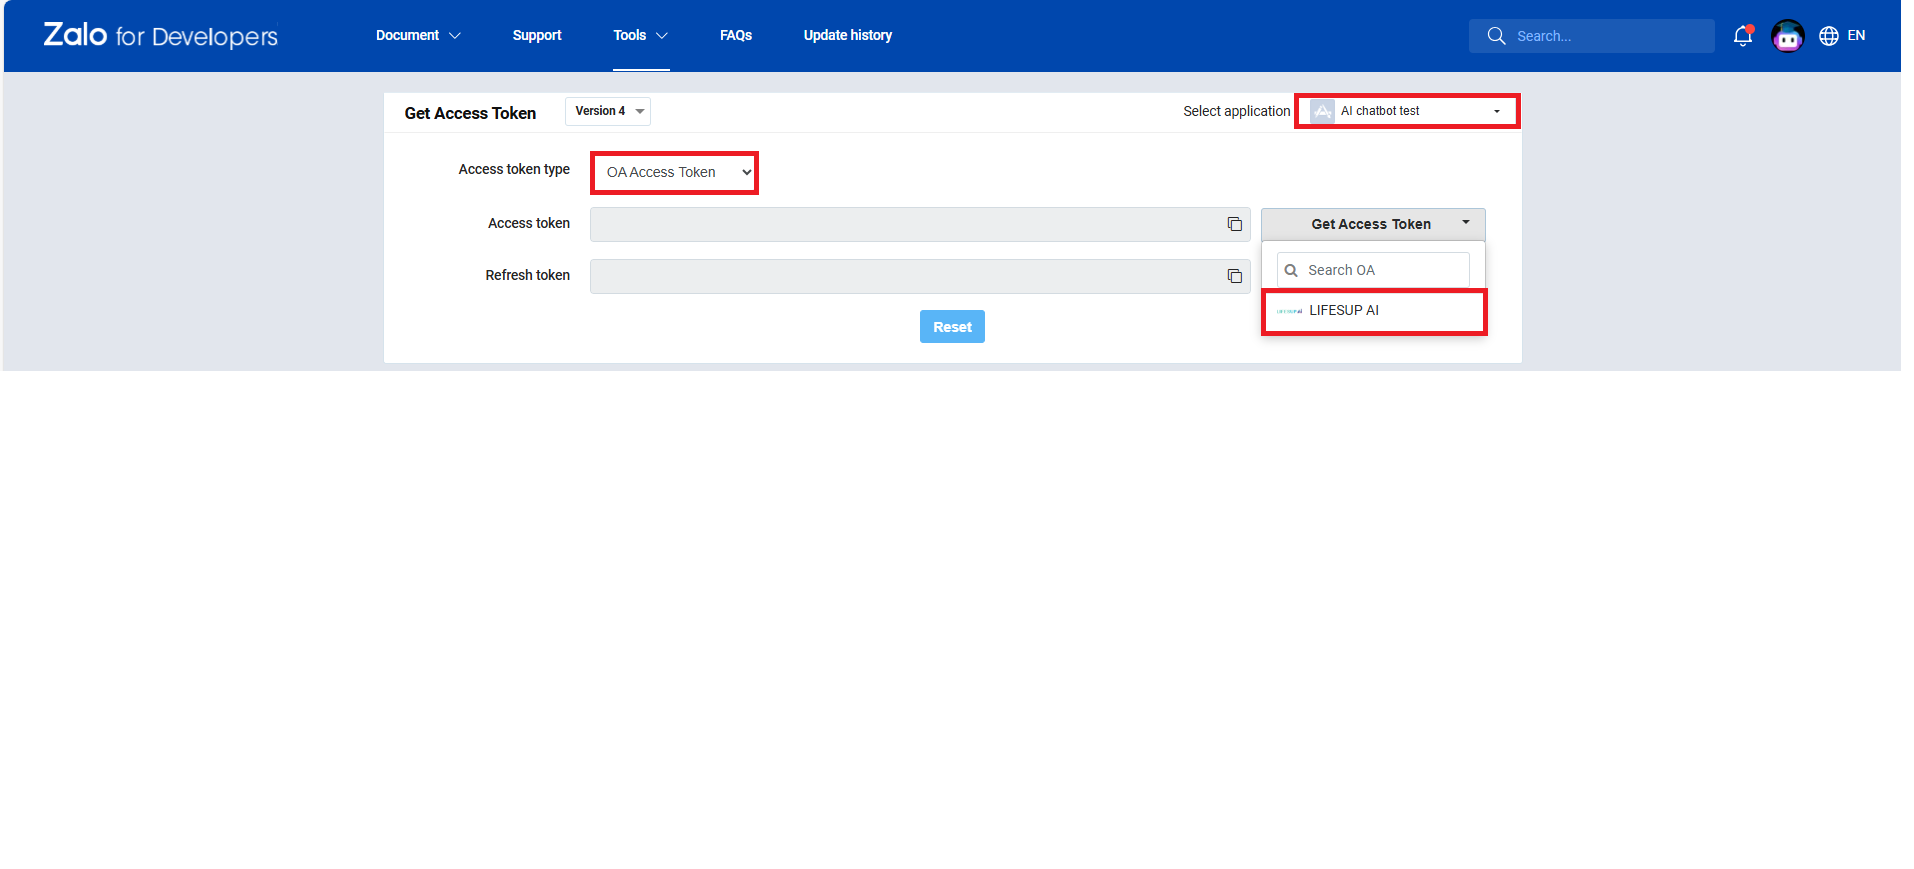
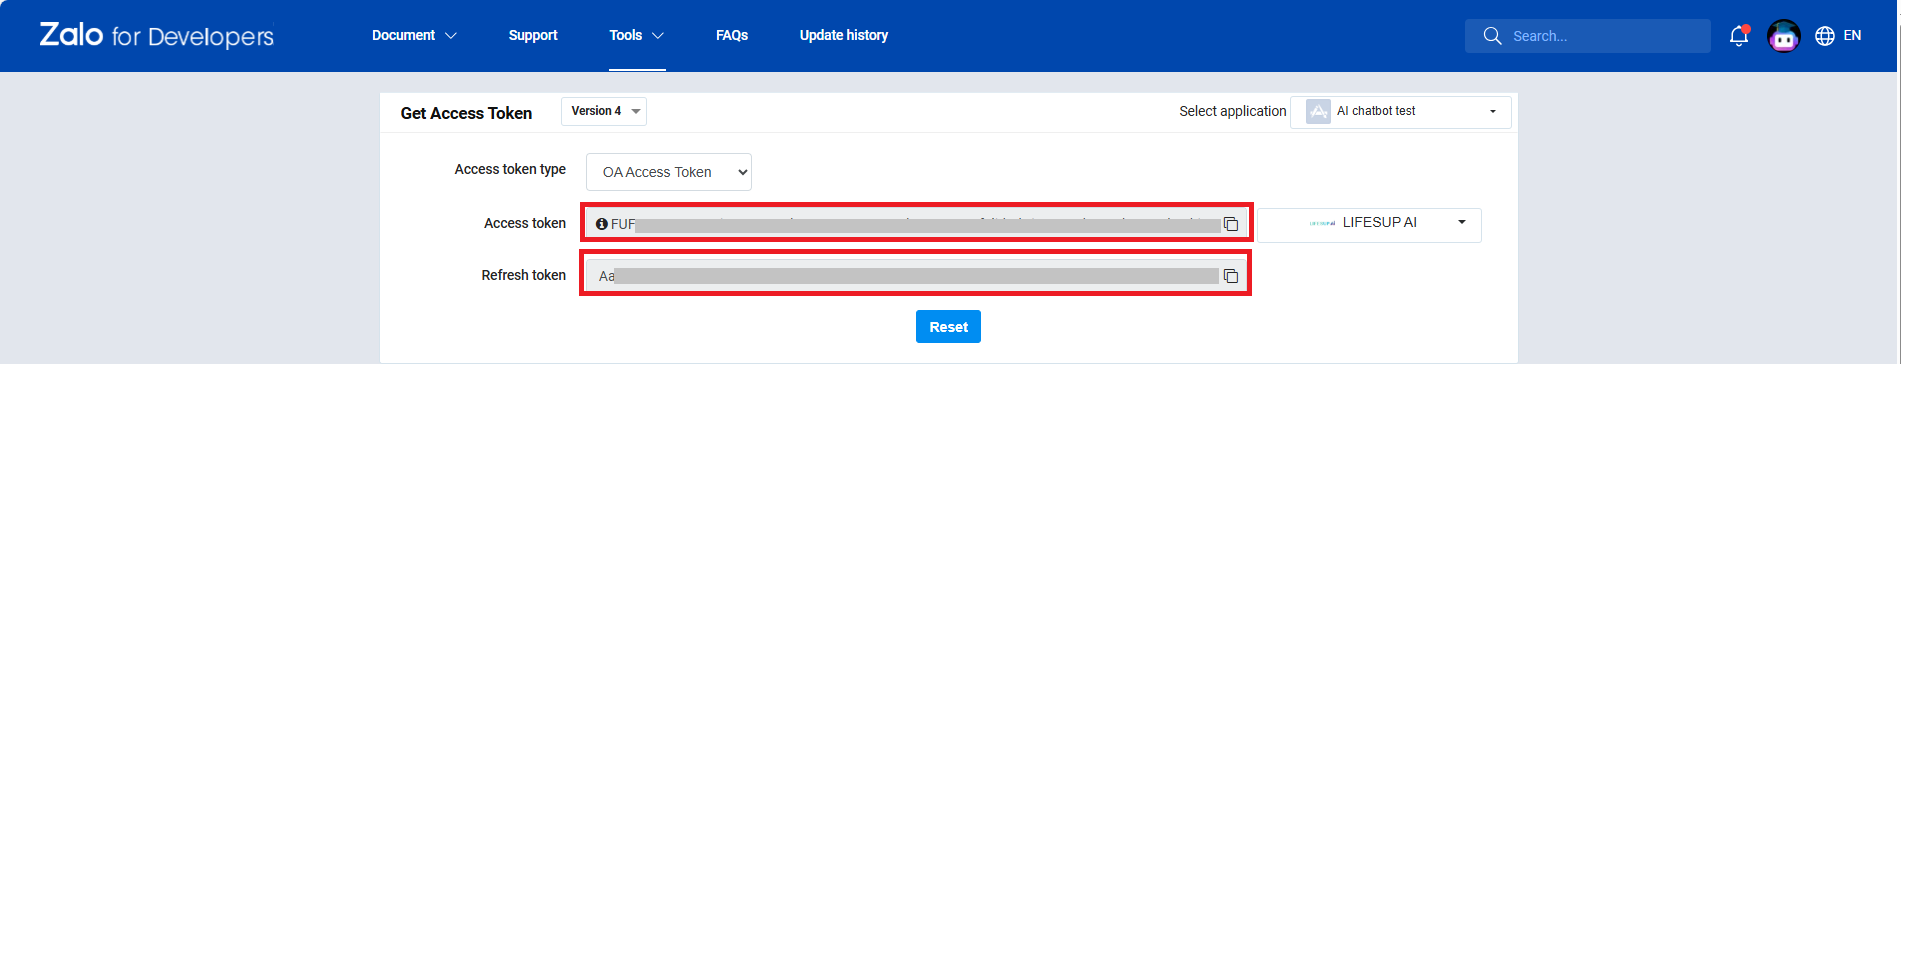
Lastly, obtain (access token) and (refresh token) for use in the following steps. Your app is now linked to the Official Account.
You can refer to the document directly from the Zalo platform link.
Step 4: Update integrated configuration Zalo on dxconnect
Log in using your account on the Dxconnect system, go to the Integration section, and select Zalo integration.
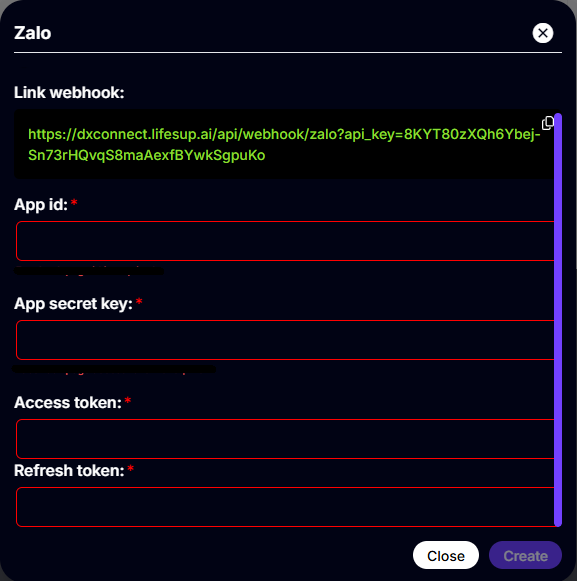
Retrieve the information obtained from the previous steps, including: (Application ID, Application Secret Key, Access Token, and Refresh Token). Fill in all the information in the configuration form
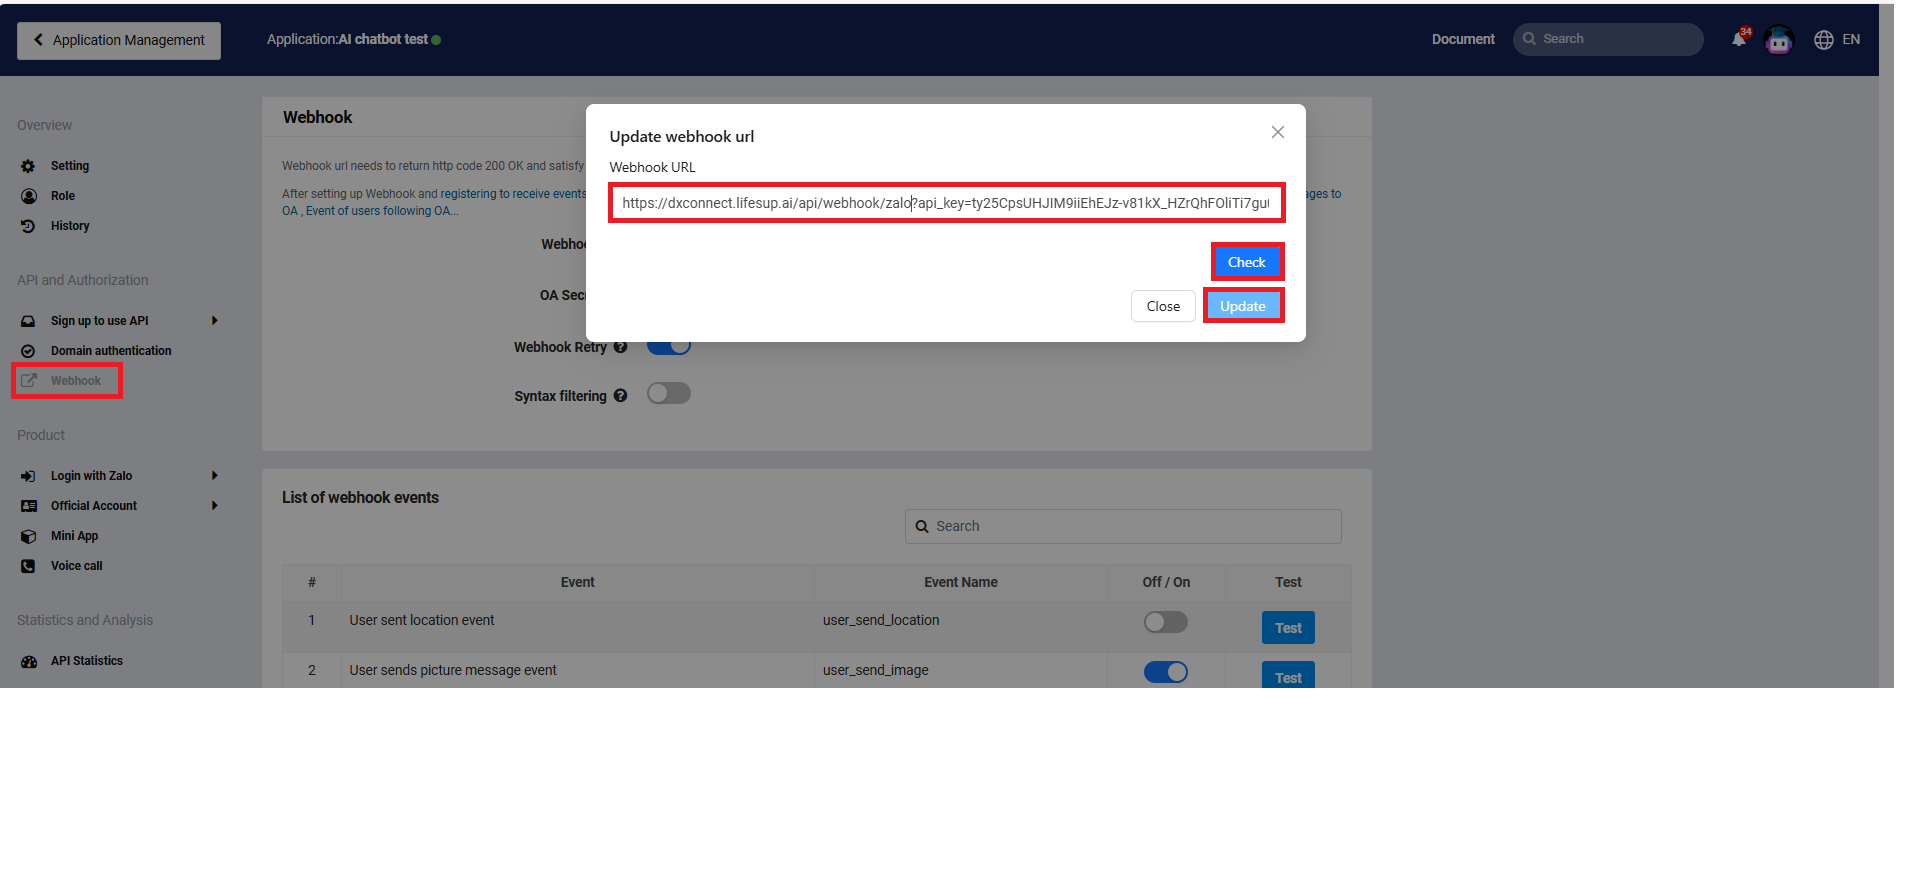
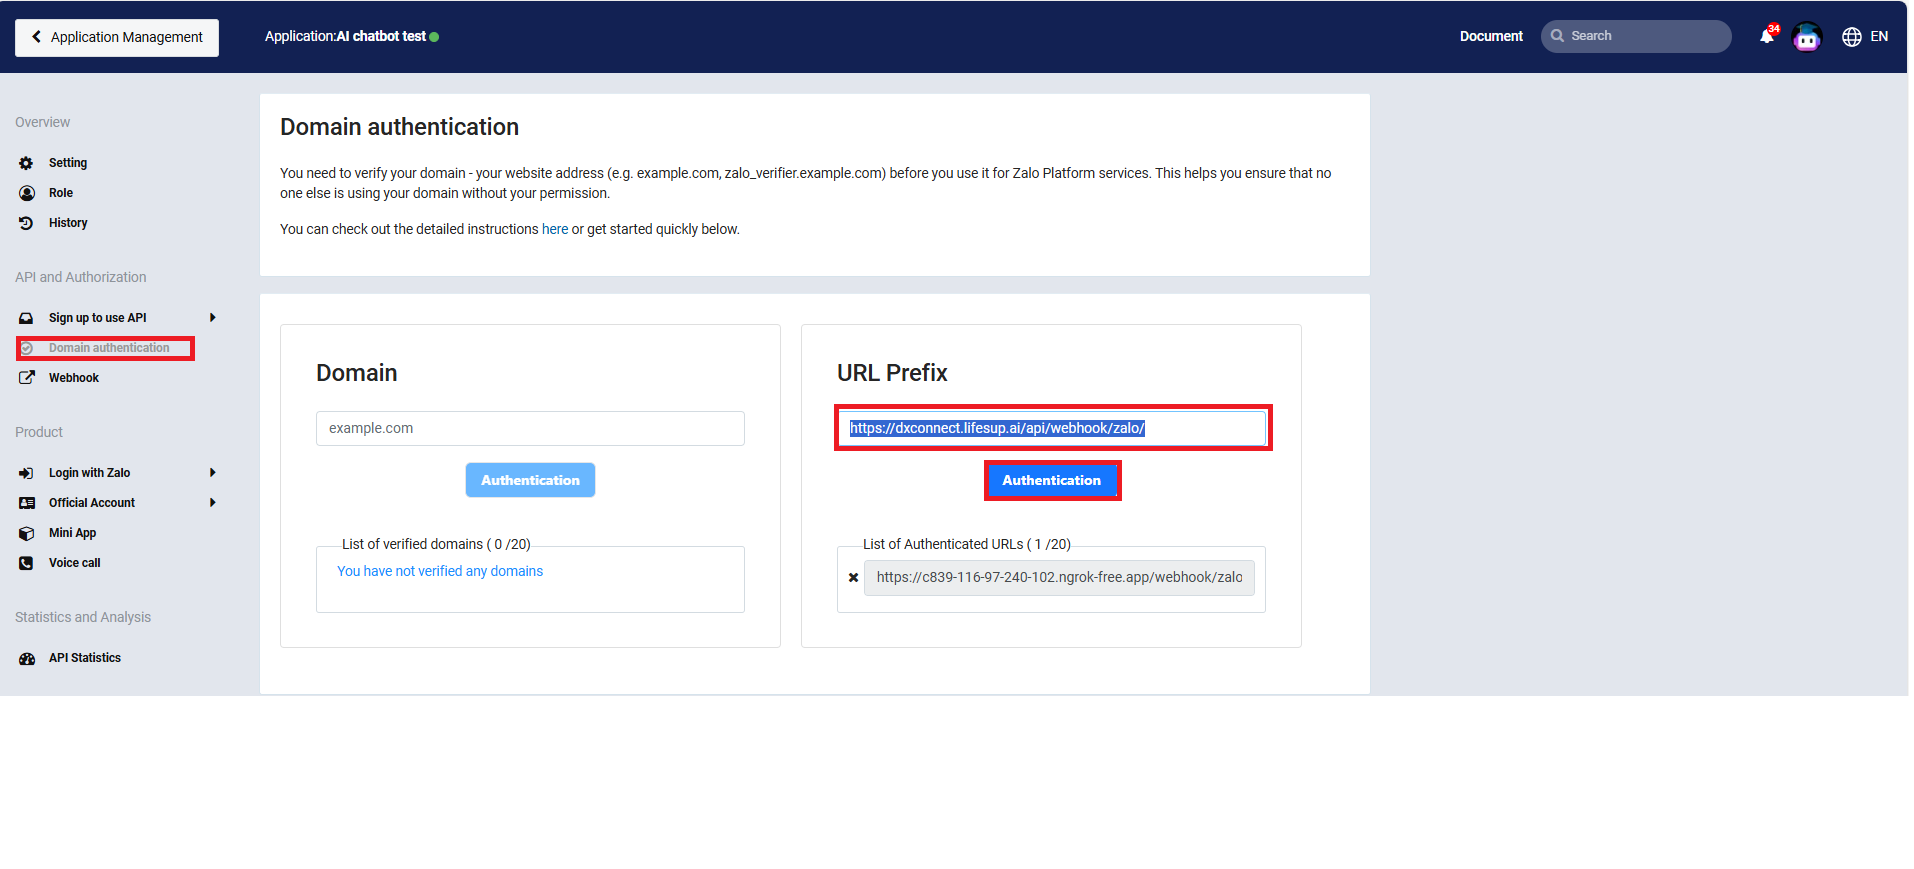
Copy the (Link webhook) displayed on the form and switch to Zalo app
Go to the Domain Authentication section. In the URL Prefix field, use the following URL: (https://dxconnect.lifesup.ai/api/webhook/zalo/) and click the authentication button.
Update the webhook URL in the Webhook section. The Webhook URL is (Link webhook) obtained in the previous step.