Slack
Overview
In this guide, we'll go through how to integrate your AI Assistant into Slack. Here's an overview of what we'll cover:
- Creating a dedicated Slack app
- Configuring the Slack app
- Integrating your Slack bot with DxConnect
Create your Slack app
To begin the integration process, you will need a Slack app for your AI chat bot. Head over to api.slack.com/apps and click on create a new app.
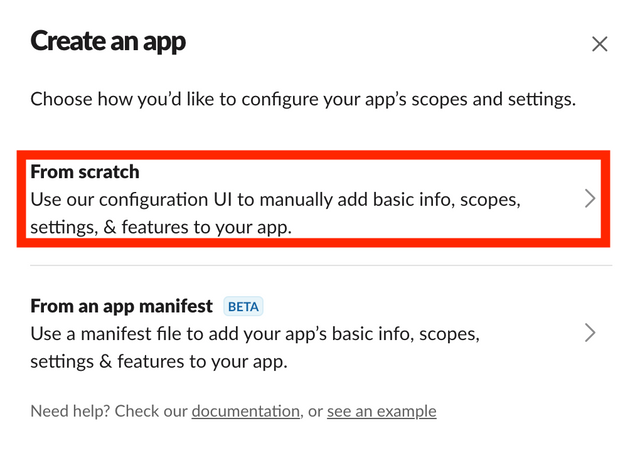
Here, we walk through creating the app from scratch. If you’ve done this sort of thing before, you can go directly to building from app manifest that we provide below.
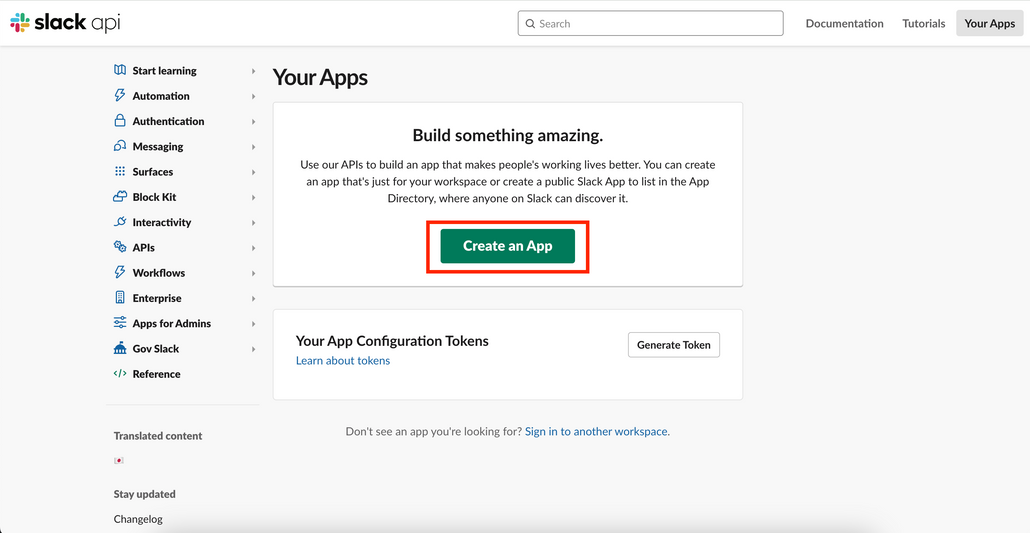
Then select Create an app from scratch, set your AI Assistants’s name and select the Slack workspace you want to add it to and click Create App.
Configure your Slack app
Let's start configuring your Slack app, with the following steps
OAuth & Permissions
The first and most important step we need to set permissions for the bot, including:
-
channels:history
-
chat:write
-
im:history
-
im:read
-
im:write
-
users:read
-
users:read.email
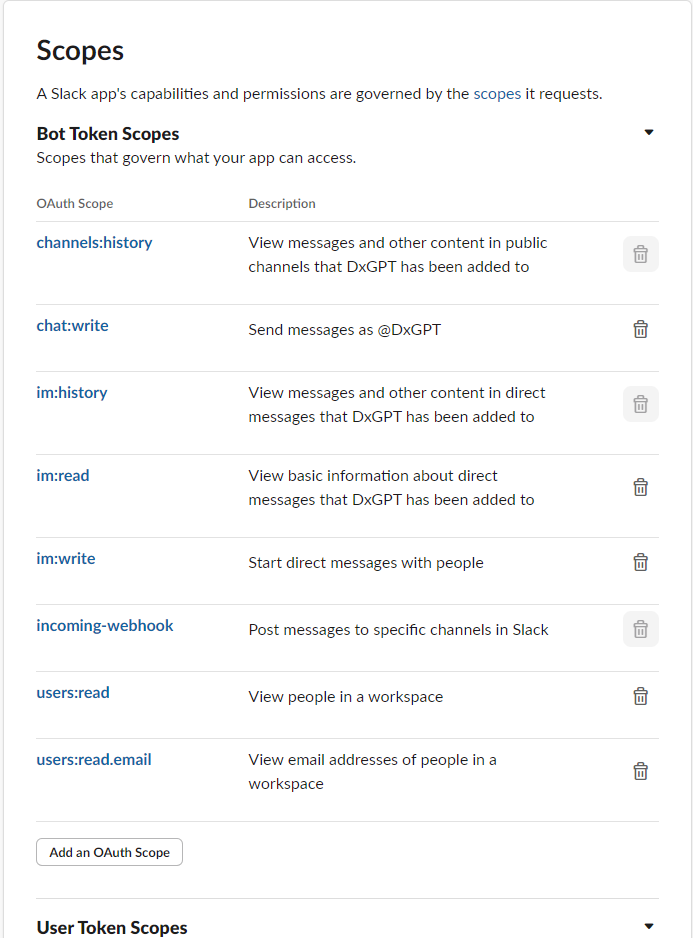
After adding the scopes, we need to reset the permissions on our space
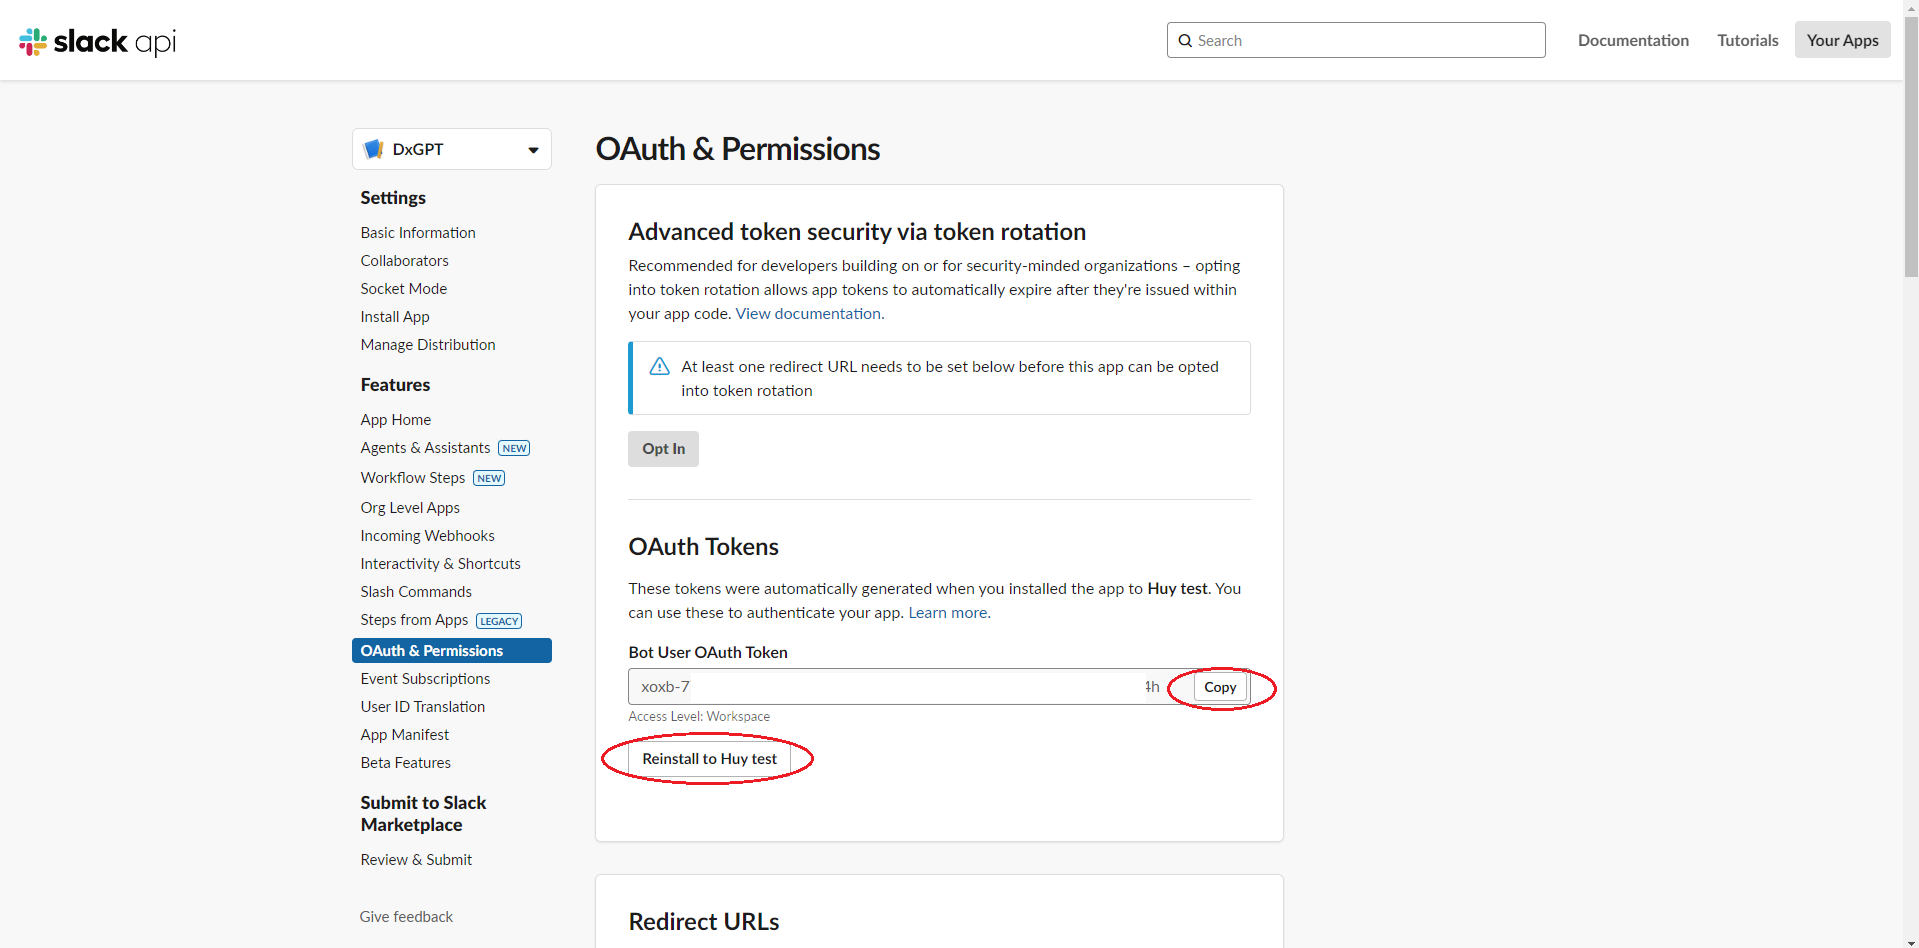
Then copy the bot's token to use in the next step.
Integrate your Slack bot with DxConnect
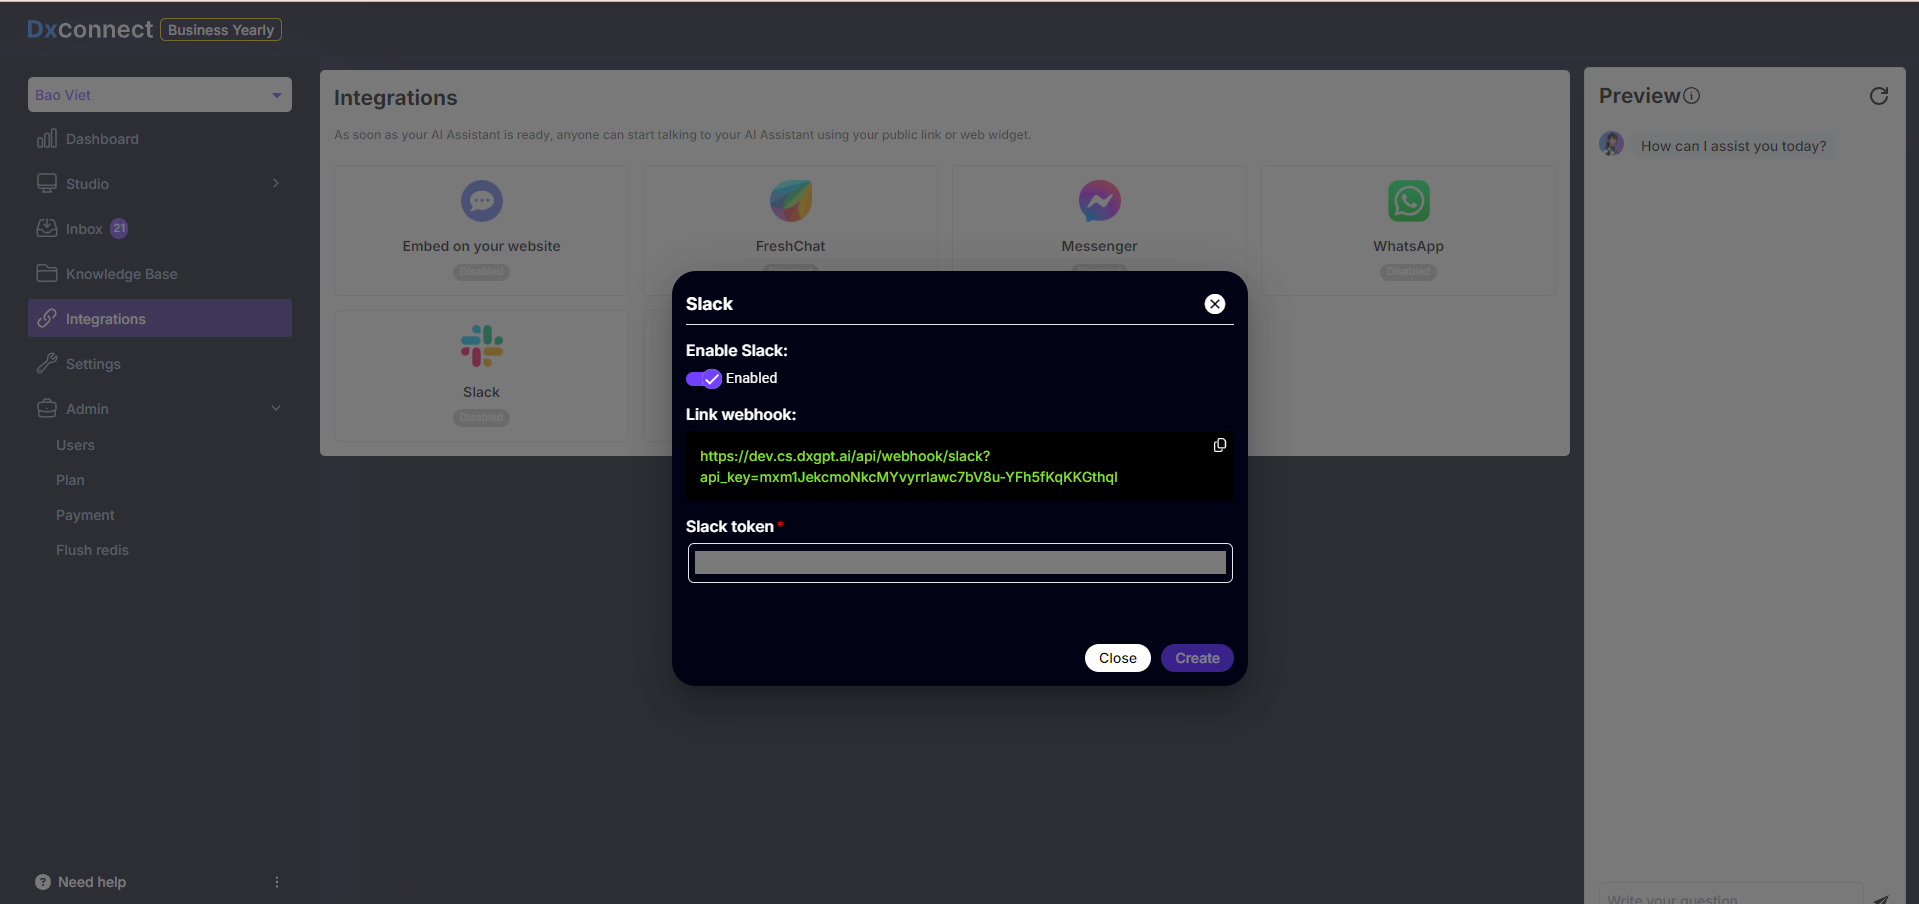
Use the bot token from the step above and enable the Slack integration on DxConnect and save the Webhook link.
Event Subscriptions
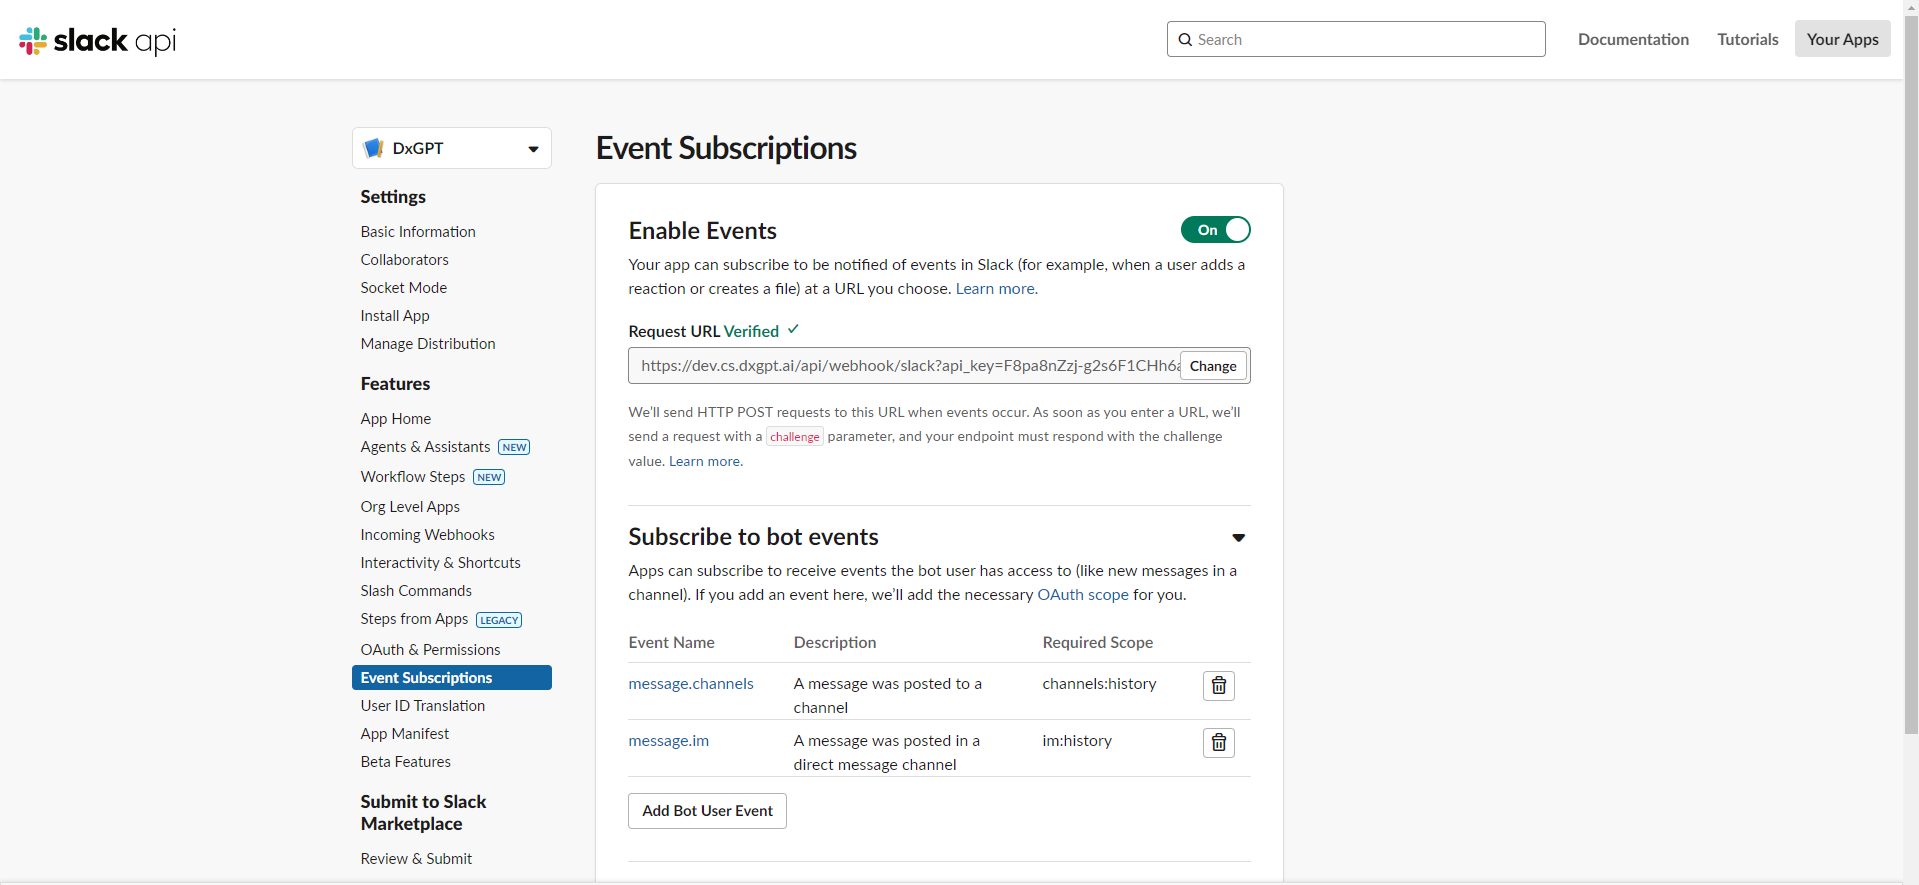
After configuring the bot, we will open the Event Subscriptions section.
Moving on to Event Subscriptions we have the web hook link available from DxConnect. Paste in Request URL and configure Subscribe to bot events as follows:
-
message.im
-
message.channels
App Home
Oh, don't forget, the step of opening the chat tab on the bot's interface, this is very important when there is a private message sent to the bot, we need to display the chat area on our bot.
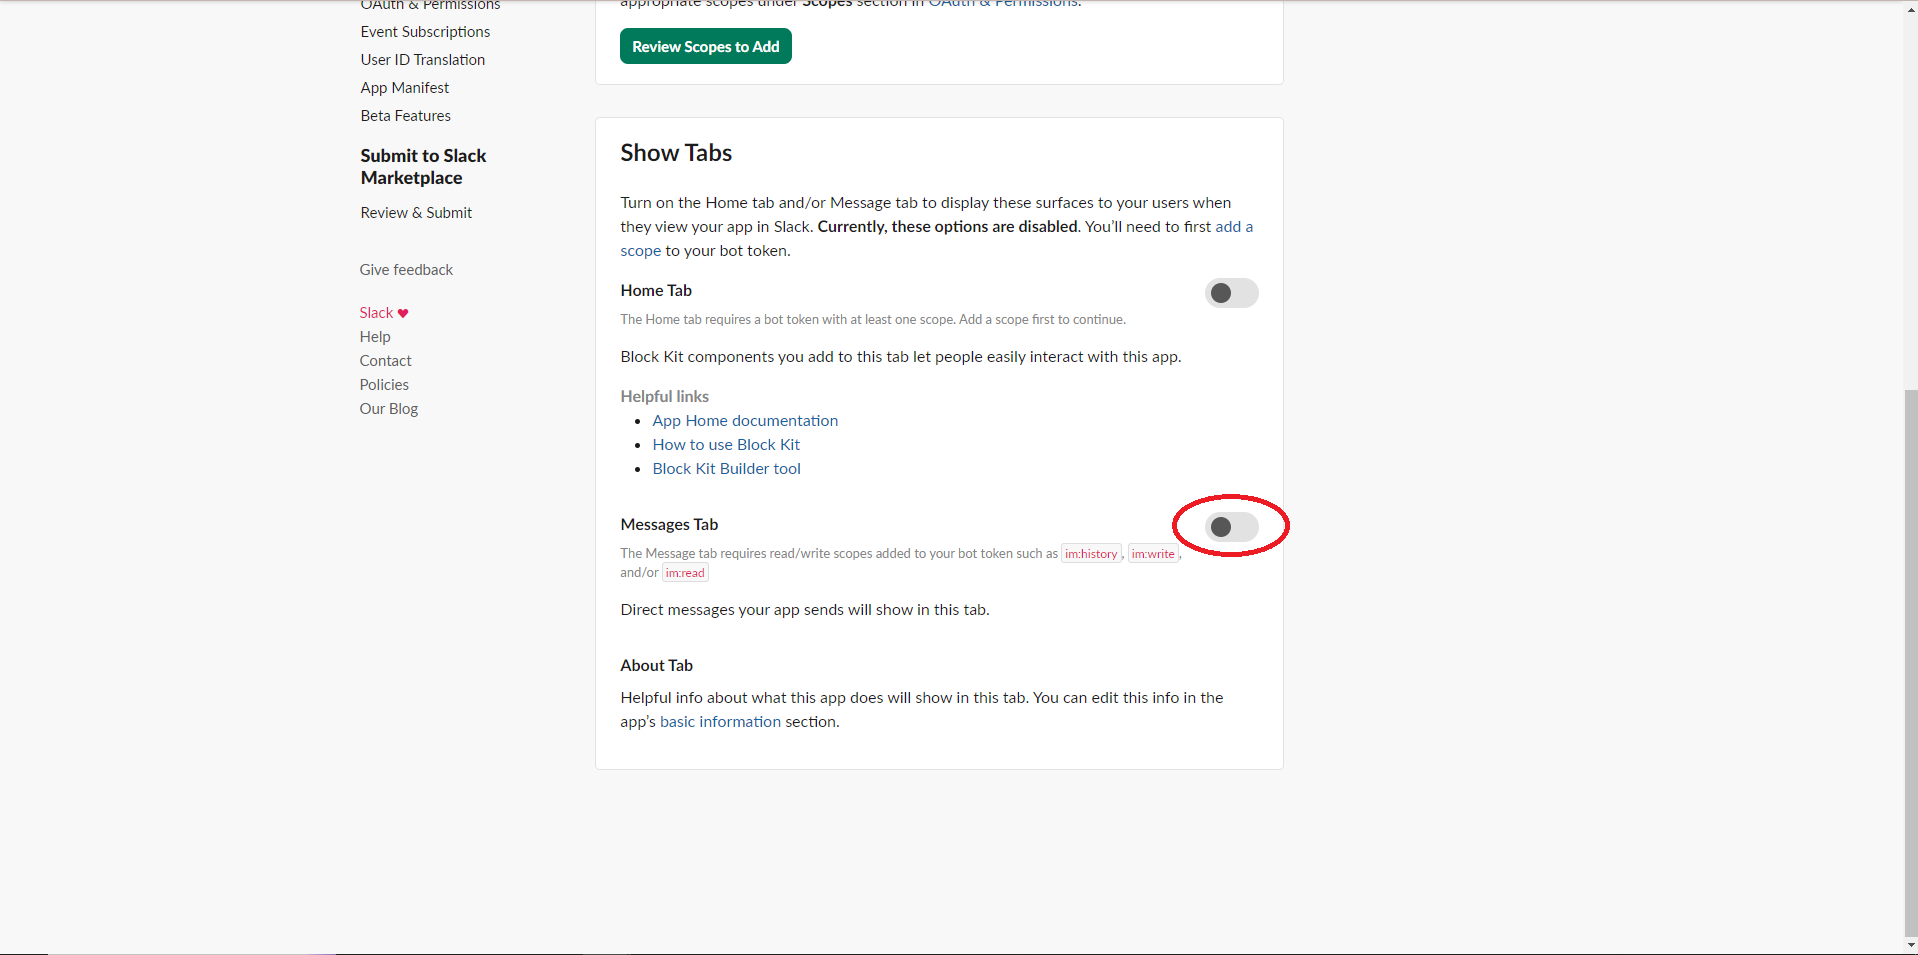
In the App Home section, scroll down to Show Tabs and activate the Messages Tab button
And that’s it! 🎉 Your AI chat bot is ready to be tested on Slack! YAY!