Overview
In this guide, we'll go through how to integrate your AI Assistant into WhatsApp. Here's an overview of what we'll cover:
- Prerequisites
- Connecting Quickchat AI to WhatsApp
- Connecting your AI Assistant to WhatsApp
Prerequisites
1. Phone number
It is important to decide which phone number you are going to use for your WhatsApp integration.
You cannot use your personal phone number. You need a dedicated phone number for your business - able to receive voice calls or SMS. If you would like to learn more, see WhatsApp documentation.
One of the following will apply to you:
I) I already have a phone number for my business and I already connected it to WhatsApp.
According to the WhatsApp documentation, unfortunately, you will not be able to simply connect an external service like DxConnect to a phone number that has already been in use on WhatsApp. We understand that might be an inconvenience, but we will guide you through available options:
-
Reuse the phone number by taking the necessary steps outlined in the WhatsApp documentation. It is a two-step migration process which involves first deleting the WhatsApp account and then recreating it. WhatsApp documentation explains how to back up conversation history - whether you are an Android or iOS user. Start here.
-
Create a new phone number specifically for the DxConnect integration. There are several options here:
- purchase a new physical SIM card,
- purchase an eSIM from a provider such as Airalo, Orange, Revolut, MobiMatter, or many others
- purchase a virtual phone number from a provider such as Avoxi, OpenPhone, VirtualPhone, or many others
II) I already have a phone number for my business and I haven't connected it to WhatsApp yet.
No extra steps necessary, please follow the steps outlined below.
III) I don't have a phone number for my business yet.
As described above, we recommend one of the three methods to create a new phone number.
If you run into any issues, please get in touch.
2. Business account
When going through WhatsApp integration steps, you will be required to provide information about your Business such as:
- Business name
- Business website
- Business category
- Business description
1. Create business account
If your account has already been created then you can continue with the next steps. If you don't have a business account, you can refer to Create a business portfolio in Meta Business Suite and Business Manager Create a business portfolio.
2. Perform Meta Business account verification.
If your account has already been verified, skip it. If your Facebook Business account has not been verified, you can follow the instructions from the following link: Learn more about business verification.
Even though some of the above fields will be marked as optional, we highly recommend accurately providing all information about your business. Inaccurate or missing information may delay your integration process or cause your account to be suspended by WhatsApp.
3. Add a payment method for existing account
Add Whatsapp payment method to your business account. If you have already added a payment method, forget it. If not, you can refer to the documentation from the following link: Add a payment method to your business account.
You can use your own phone number which is subject to limits and pricing. Refer to the price list and billing method per conversation Add a payment method to your business account.
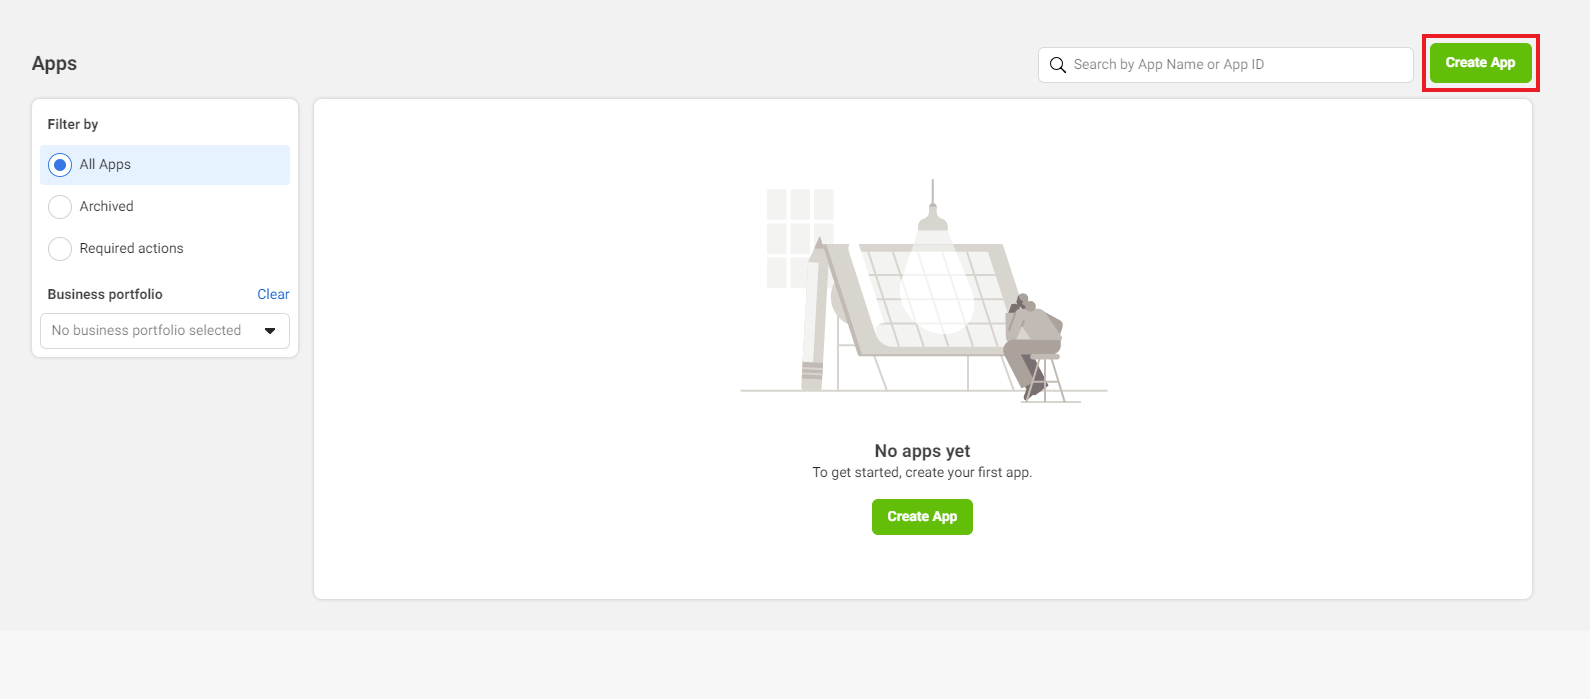
Connect DxConnect to WhatsApp
Step 1: Create Facebook App.
To connect the AI Assistant with Facebook Page, you’ll need a Facebook app. For that, go to Meta for Developers (must log in with Facebook Business management account)
Click on “Create App”.
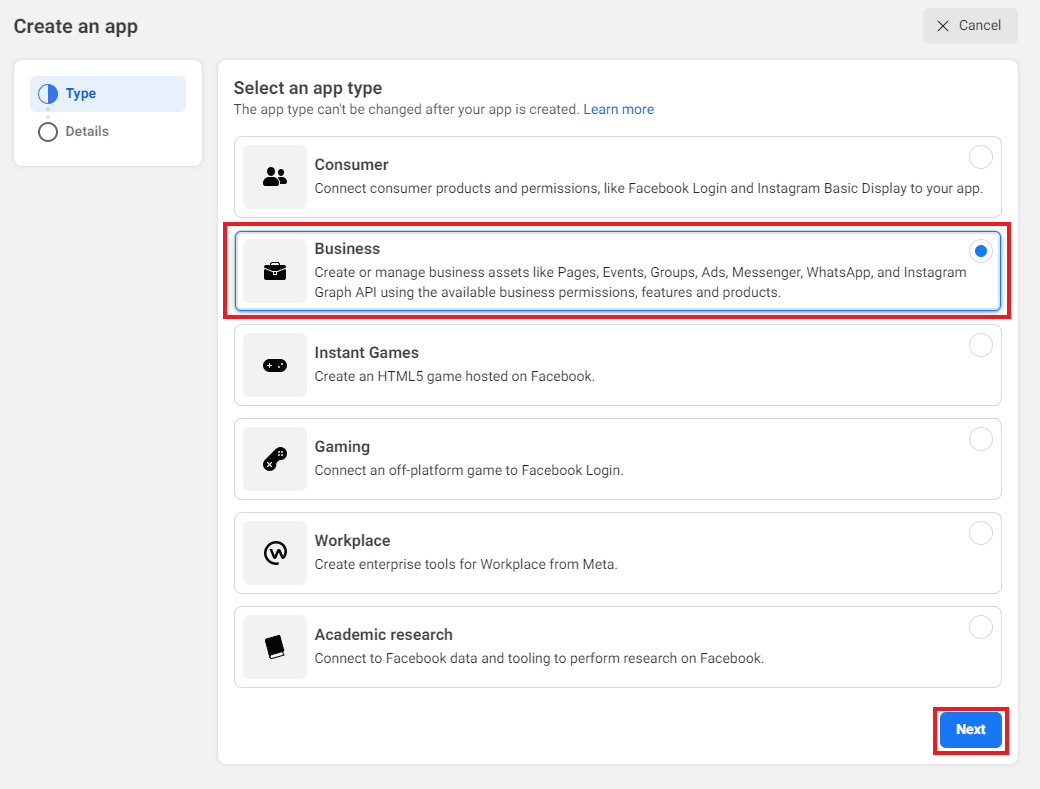
Select the “Other” option for your app and click on the “Next” button.

Select the “Business” option for your app and click on the “Next” button.
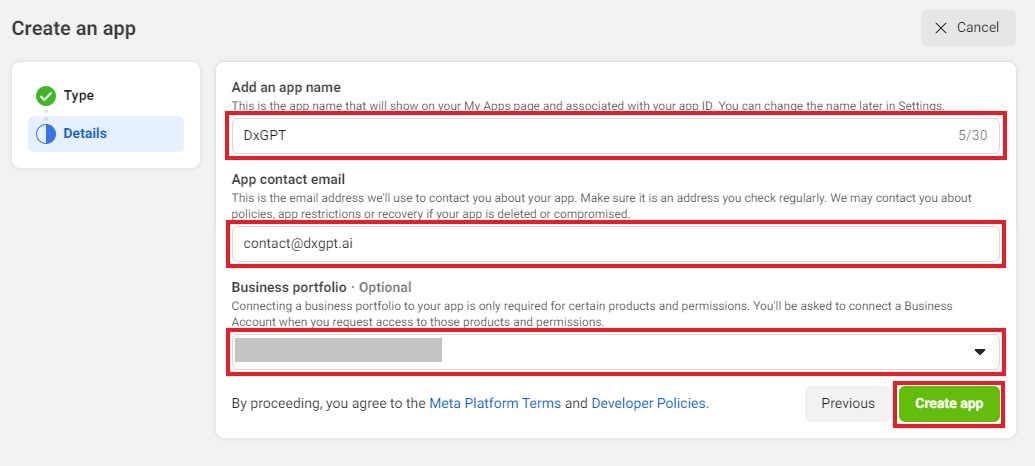
Provide “App Name”, “App Contact Email” and “Business portfolio”, then click on the “Create App” button. You’ll have to go through a security check to create an app. (Business portfolio must be a Facebook Business account)
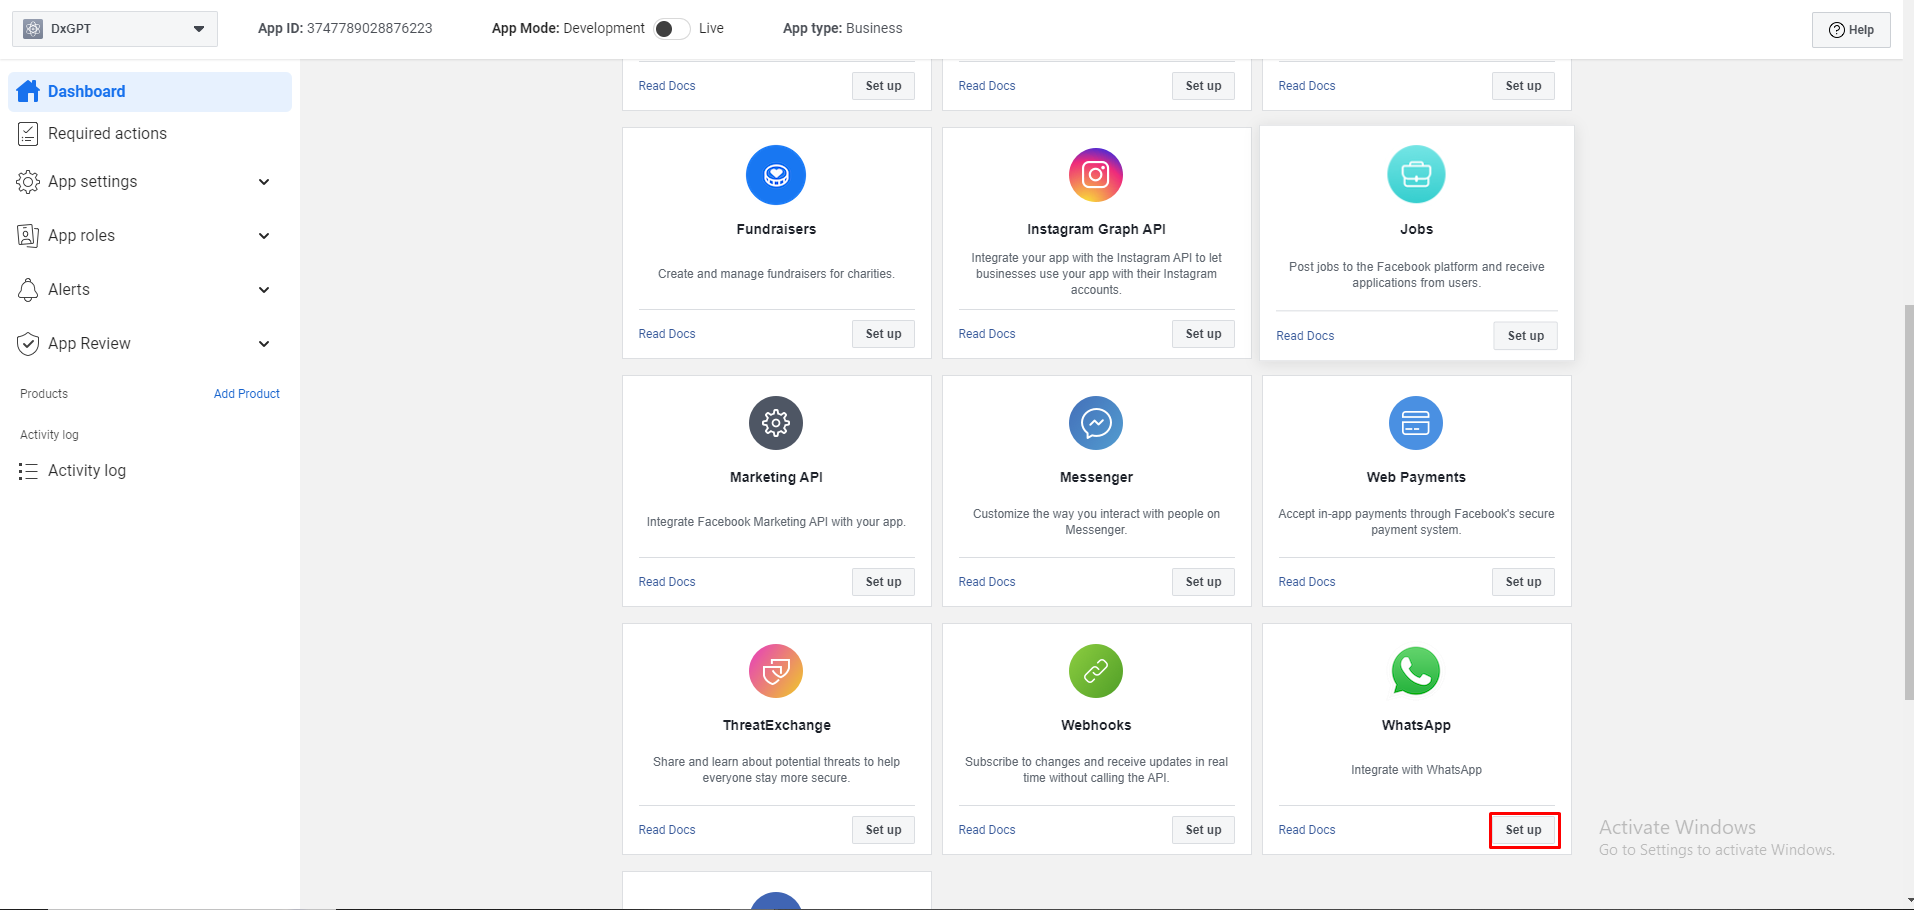
Step 2: Connect Whatsapp to the App.
Your Meta app is created, and now you need to connect your App to the Whatsapp.
Clicking on “Add Product” on the left sidebar will open a page with many options. Under Add products to your app, select “Set Up” for Whatsapp.
Step 3: Select your verified Meta Business account
Select your verified Meta Business account and choose to continue
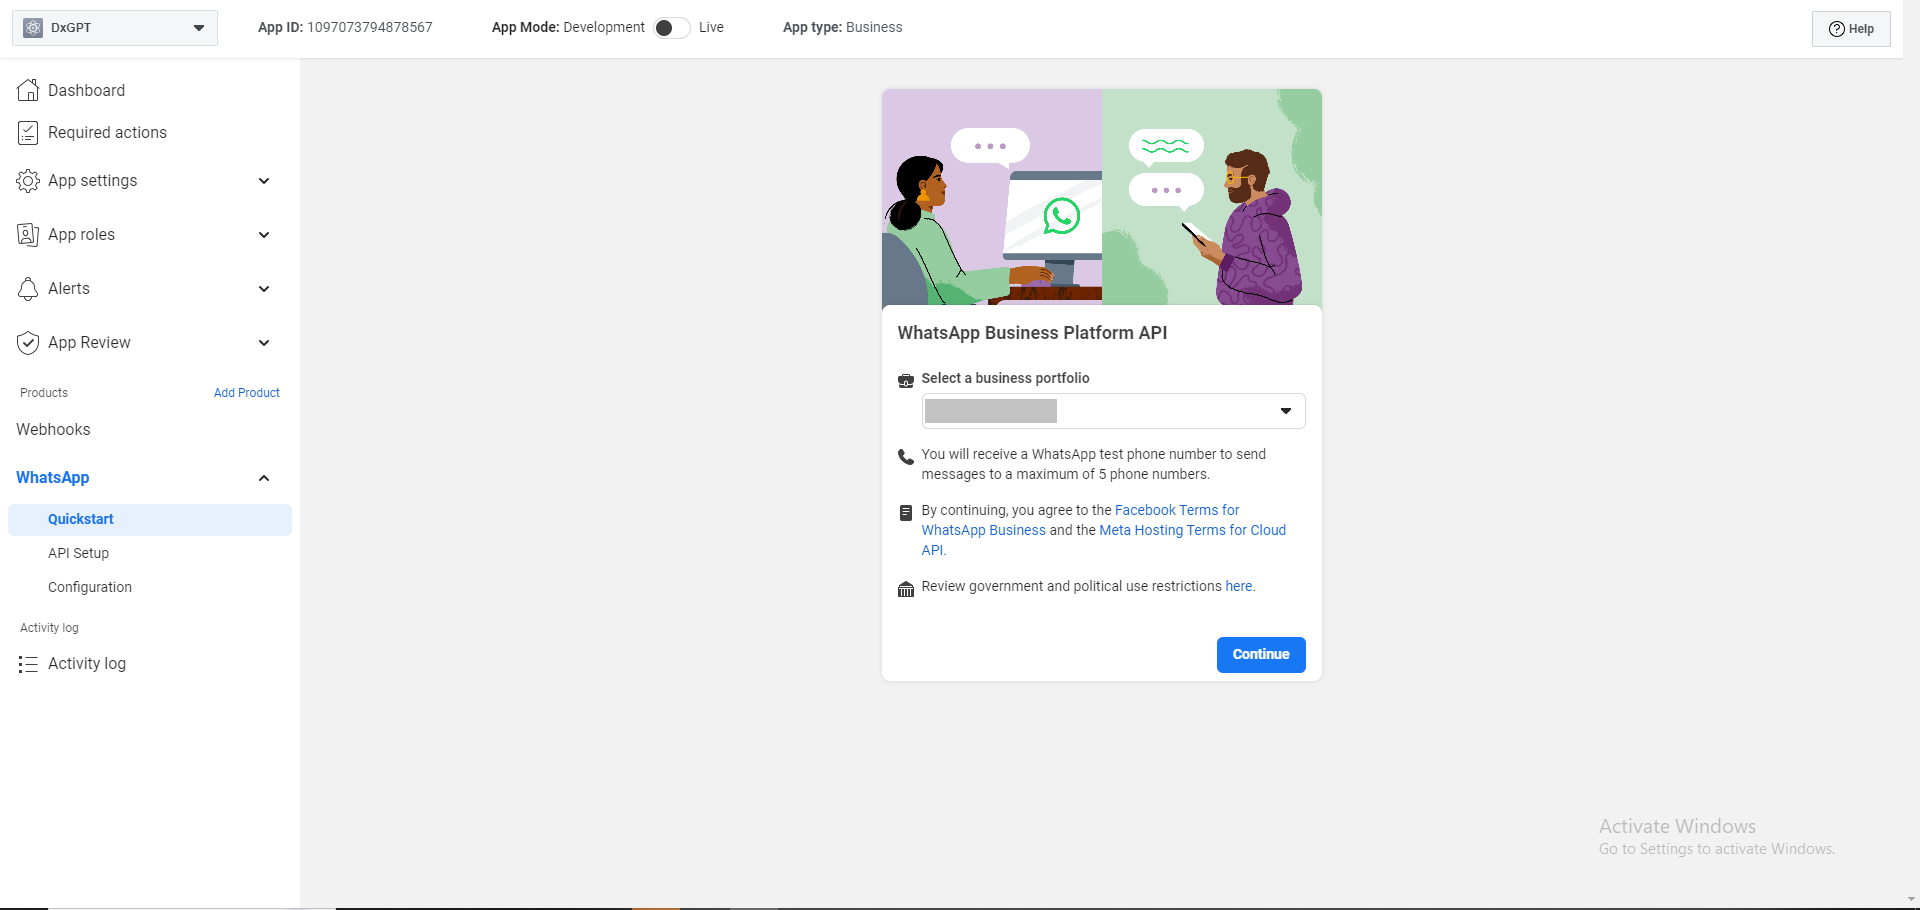
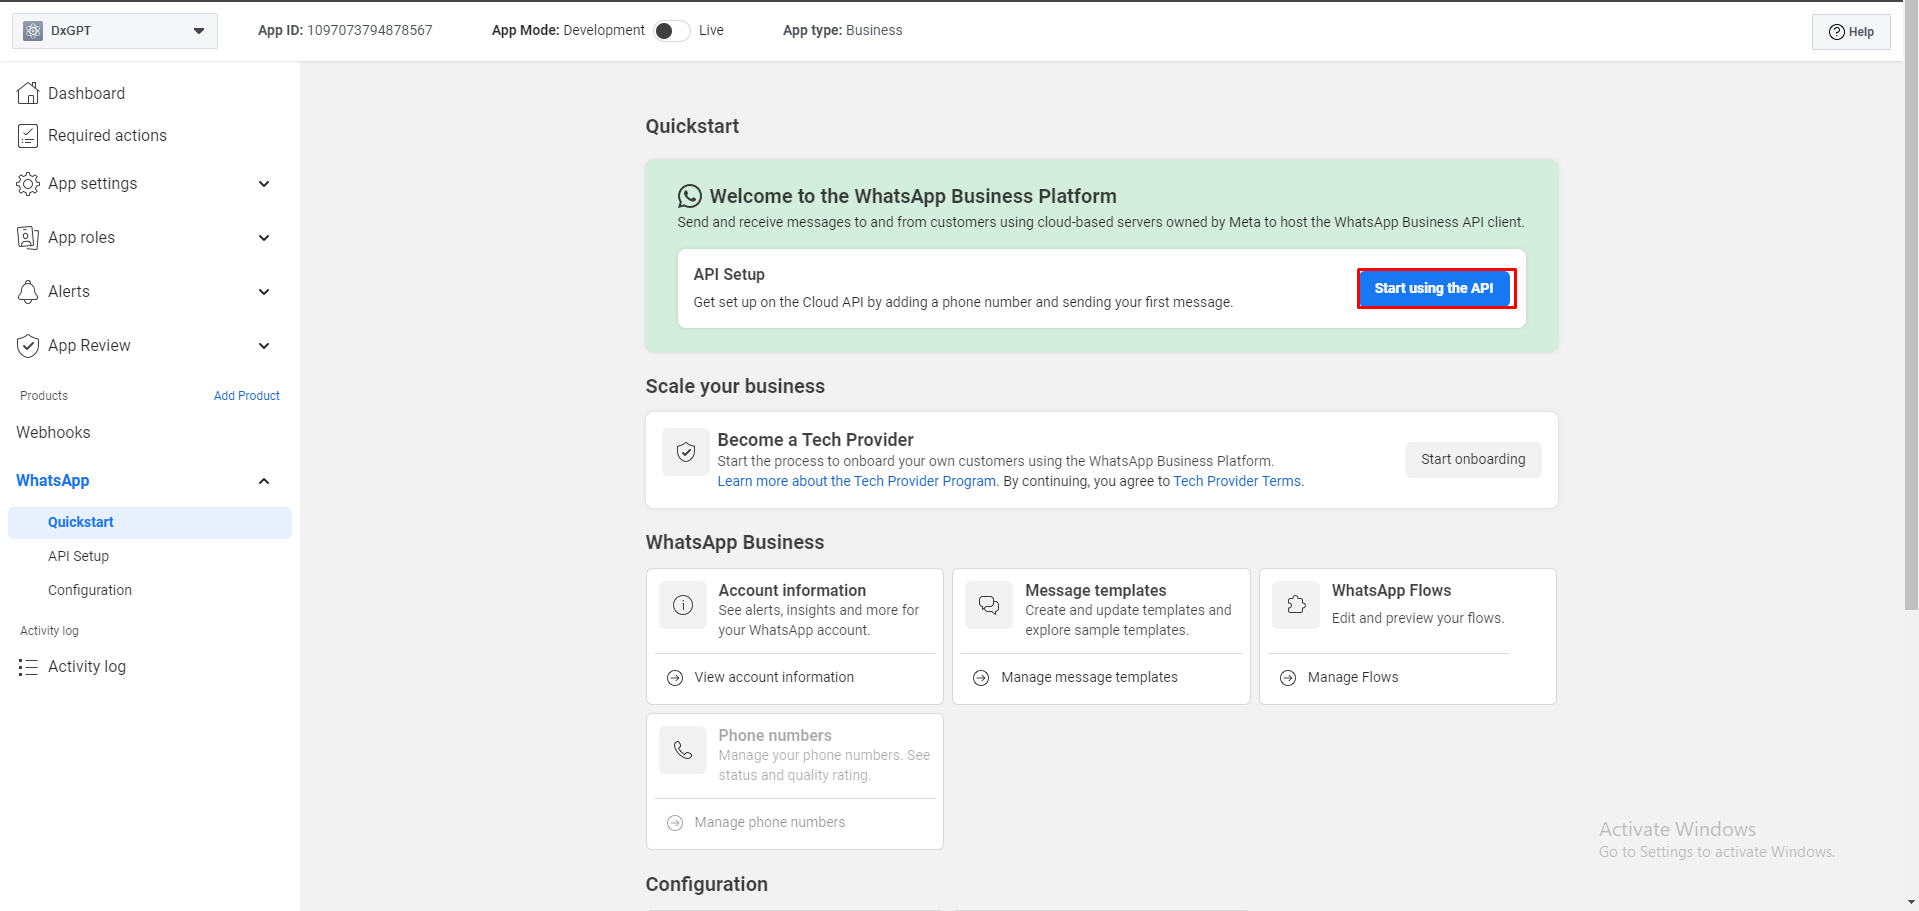
Step 4: Start using the api
At this screen, in the Quickstart section, click start using the api to continue. Send and receive messages to and from customers using cloud-based servers owned by Meta to host the WhatsApp Business API client.
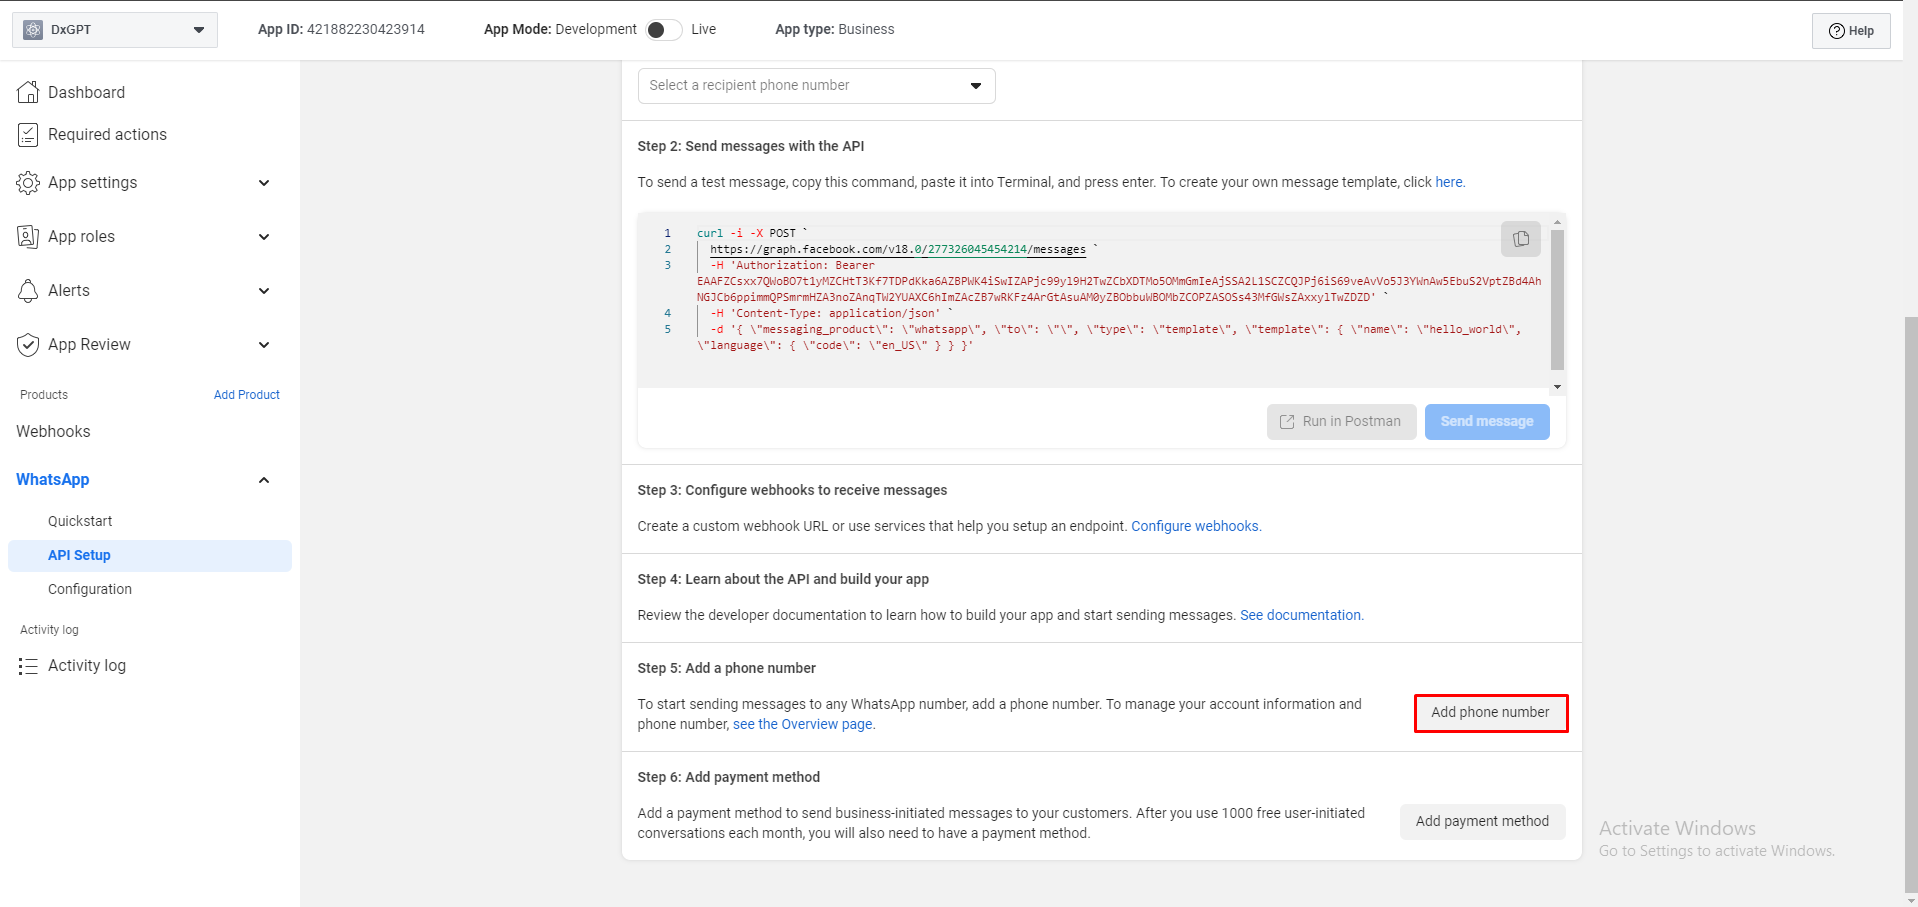
Step 5: Add phone number
If you use the phone number provided then proceed to the next steps. If you use the business phone number prepared above, you can follow these steps To add the phone number prepared above, click add phone number. This phone number is used for the Bot to text and respond to customers
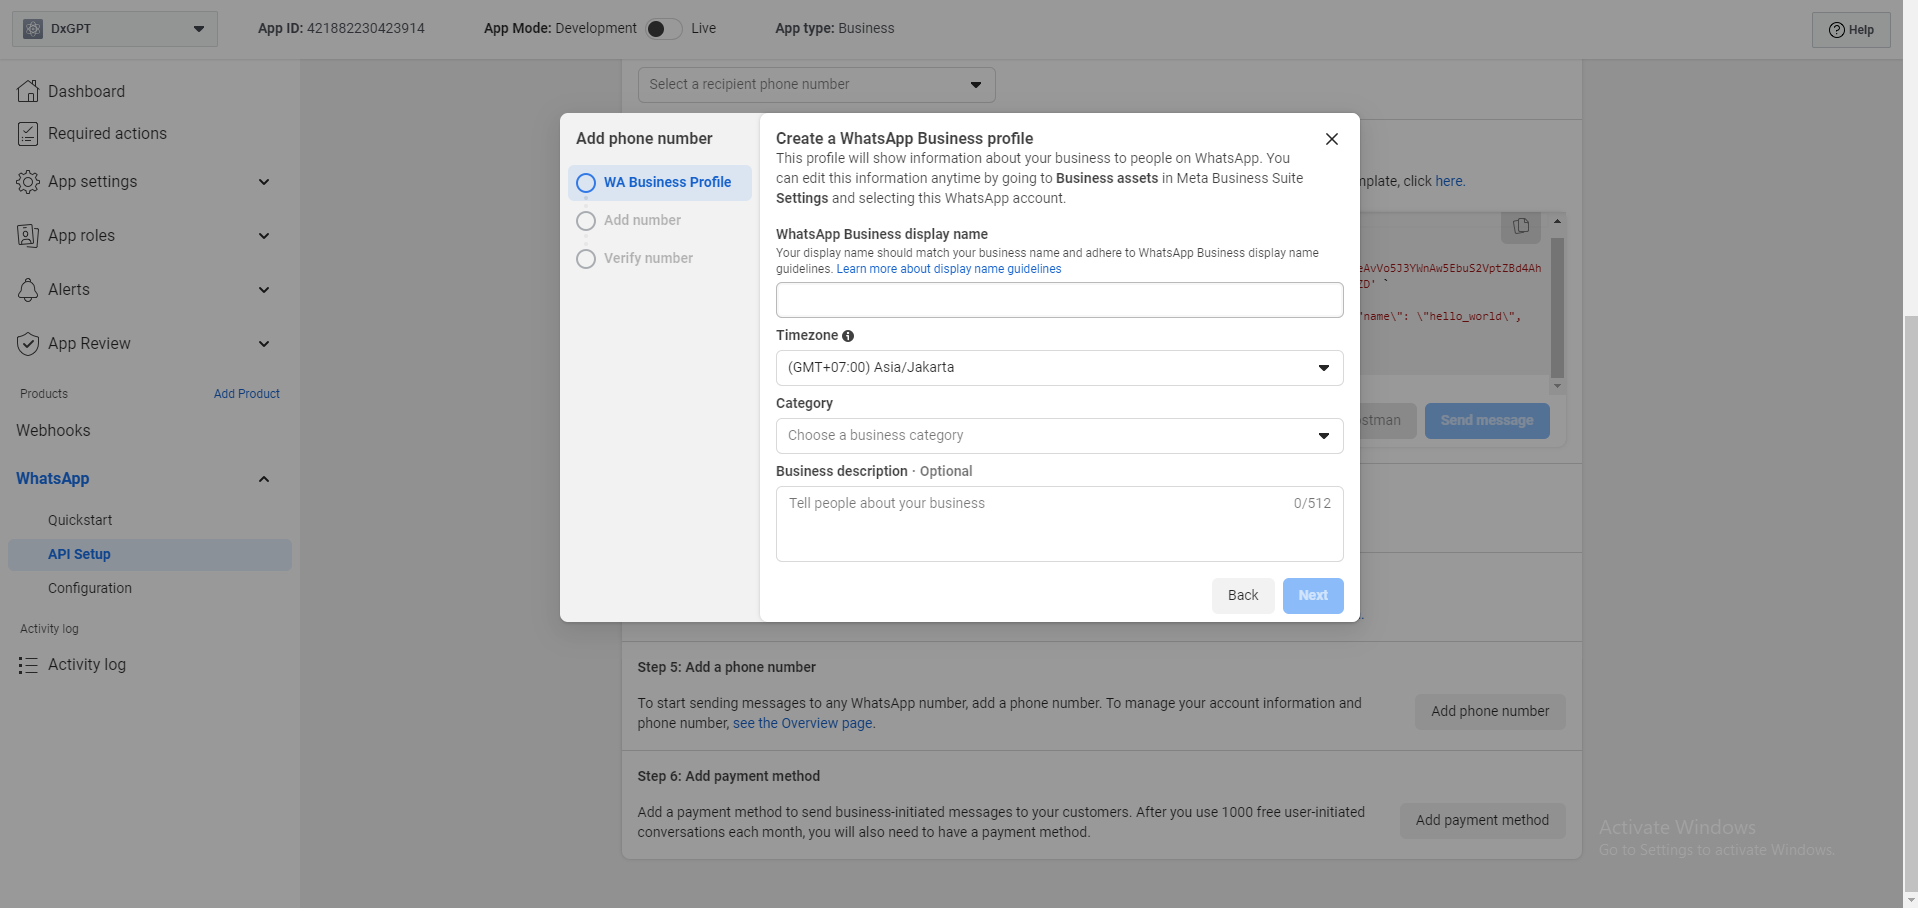
Fill in the business phone number information
Step 6: Get permanent token
This token is an access token, it is used for the Bot to call WhatsApp and requires a token to authenticate and perform that action. Of course, you cannot use a Temporary access token, and here is how to get a Permanent Token.
See more details at the link: Learn how to create a permanent token.
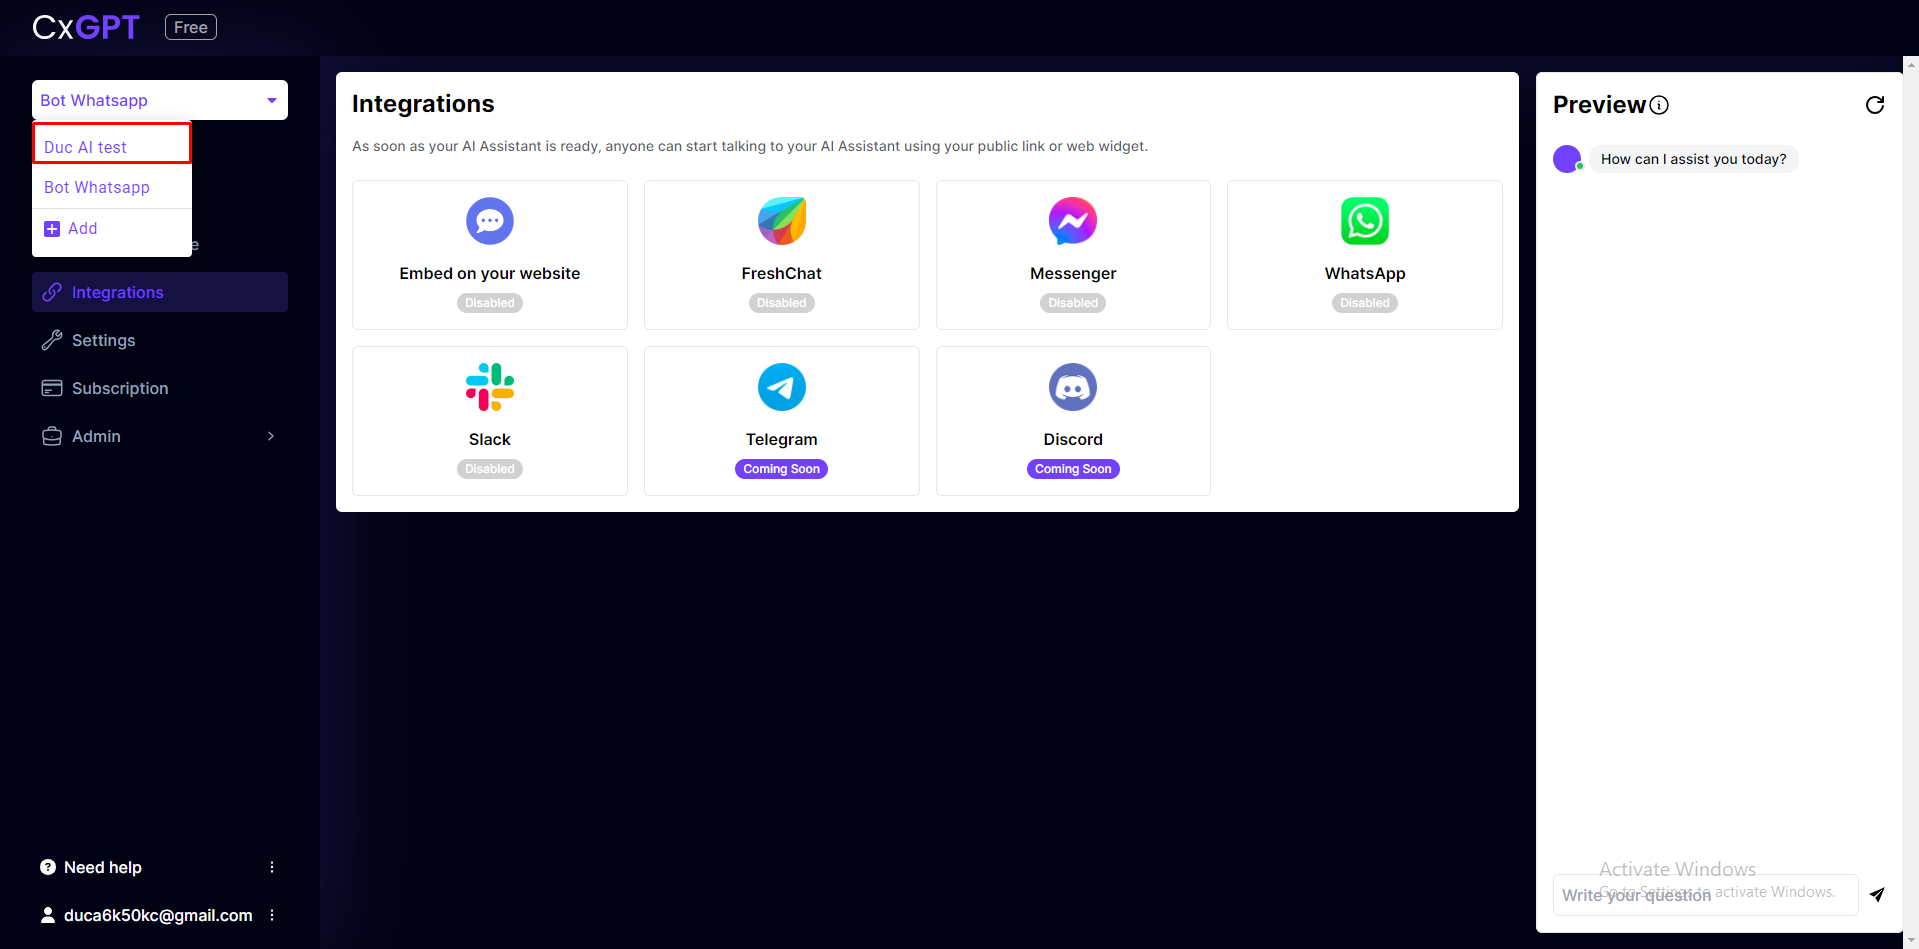
Step 7: Install Whatsapp integration in DxConnect
The first step you need to access and log in to the DxConnect website. Select AI bot for integration, and go to integration category, select Whatsapp. Follow the steps to configure:
Step 1: Select Bot AI
Step 2: Fill and get the information from whatsapp integration
Do you remember the phone number you added in Step 5? You can copy the Id of that phone number on the API Setup of the Whatsapp App you are configuring as shown below:
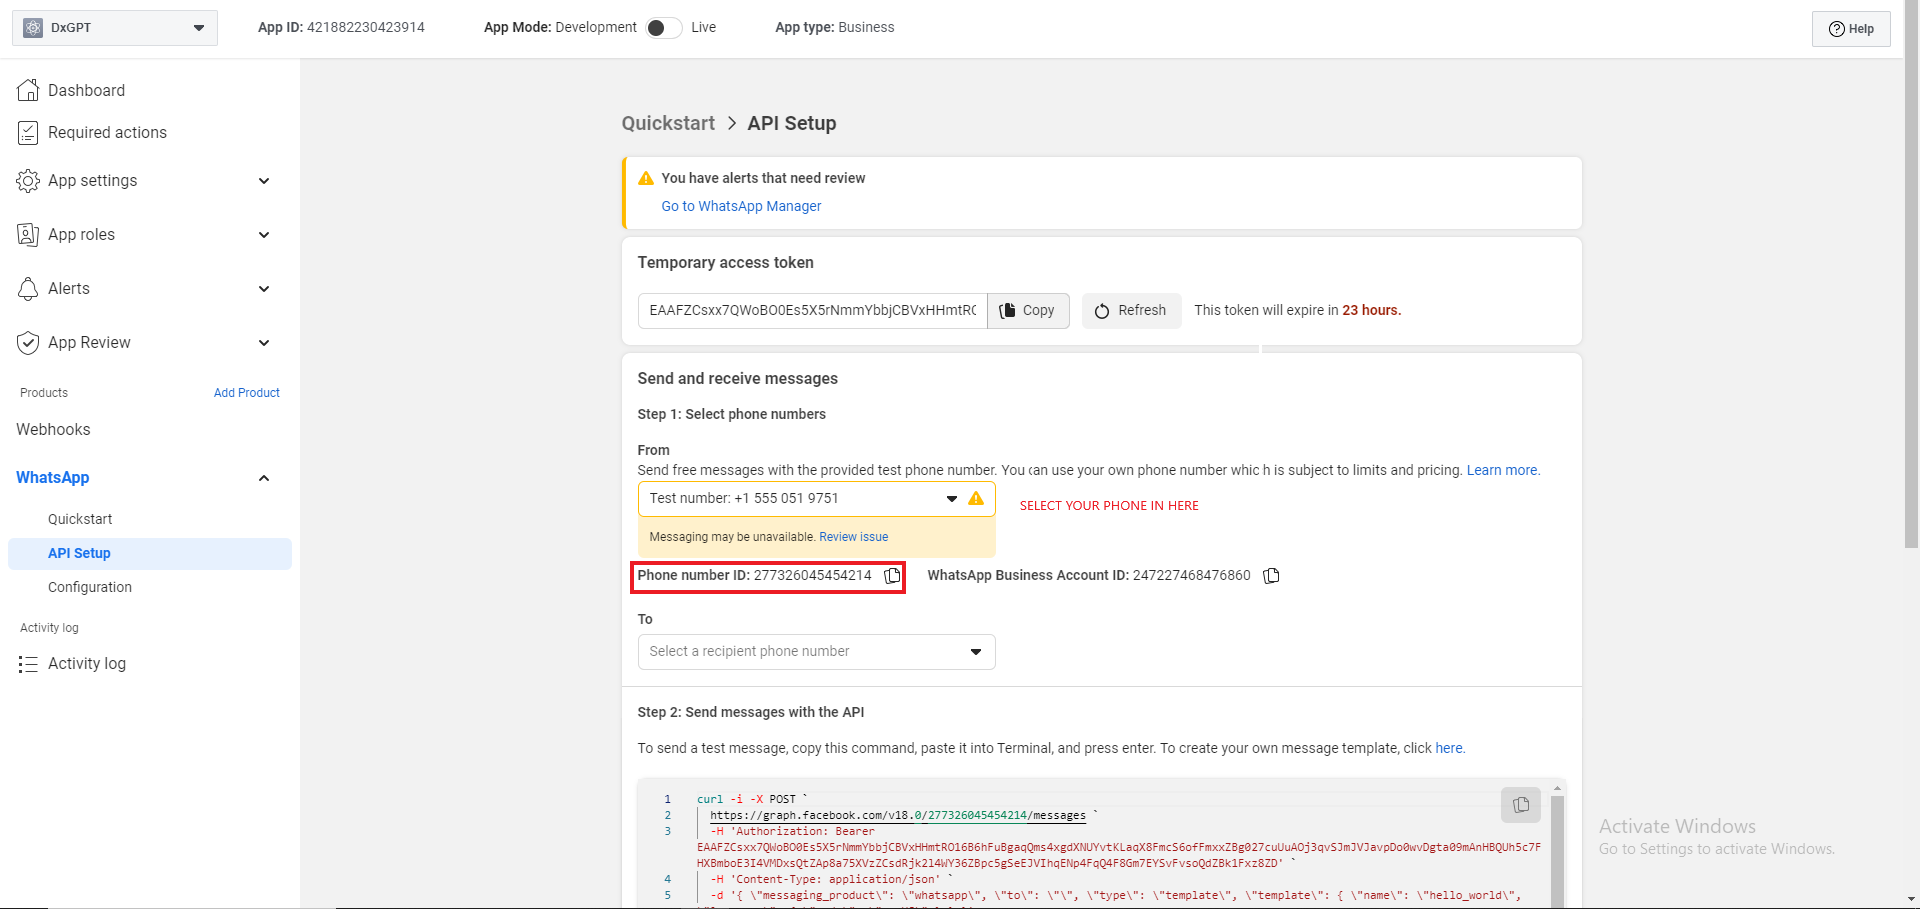
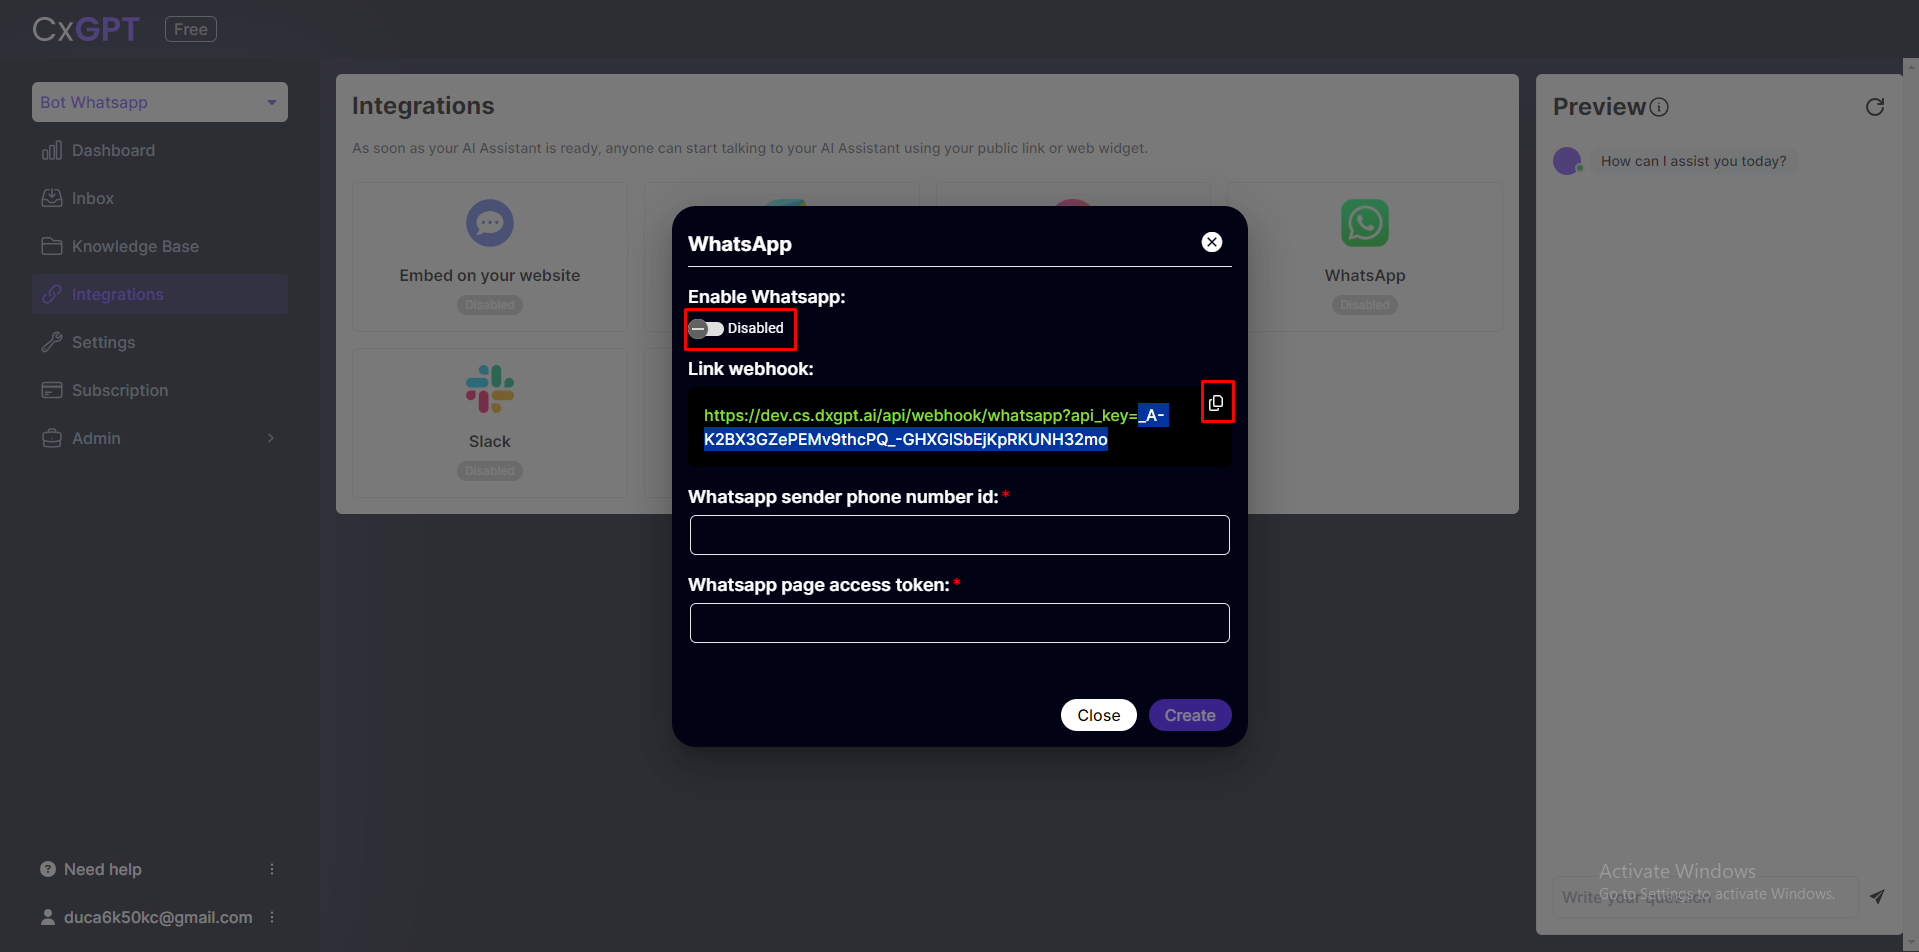
You need to activate whatsapp, then copy the webhook link, and remember the code being assigned to the api_key (in this example: "A-K2BX3GZePEMv9thcPQ-GHXGlSbEjKpRKUNH32mo"). This is the verification token .
Now you have an iphone number id, and permanent token. Fill in that information on the whatsapp configuration form and click Create button
Step 3: Configuration on webhook
Go to configuration and select edit, here you fill in the information
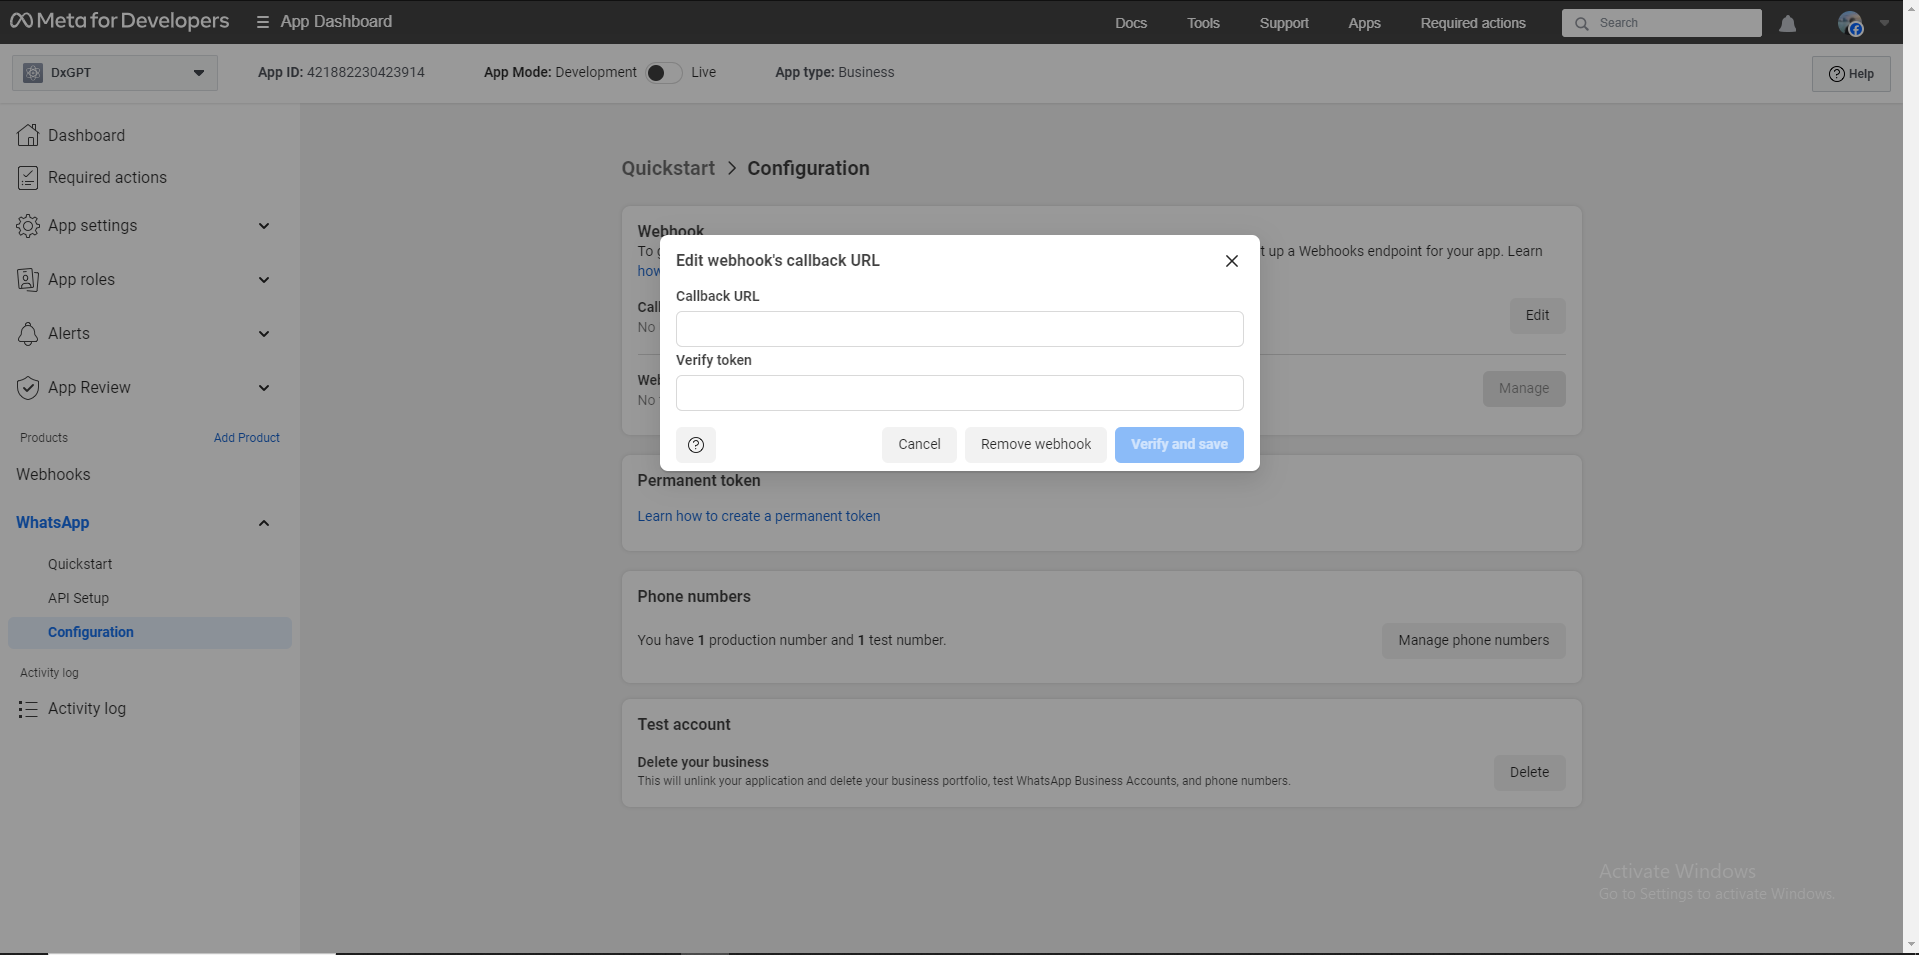
Callback URL : It's the webhook link you stored above in Step 2
Verify token : This is the verification token you obtained above in Step 2
Then press the "verify and save" button
Step 4: Sign up to receive messages on webhooks
Access the Webhooks category on the left sidebar, select subscribe to messages
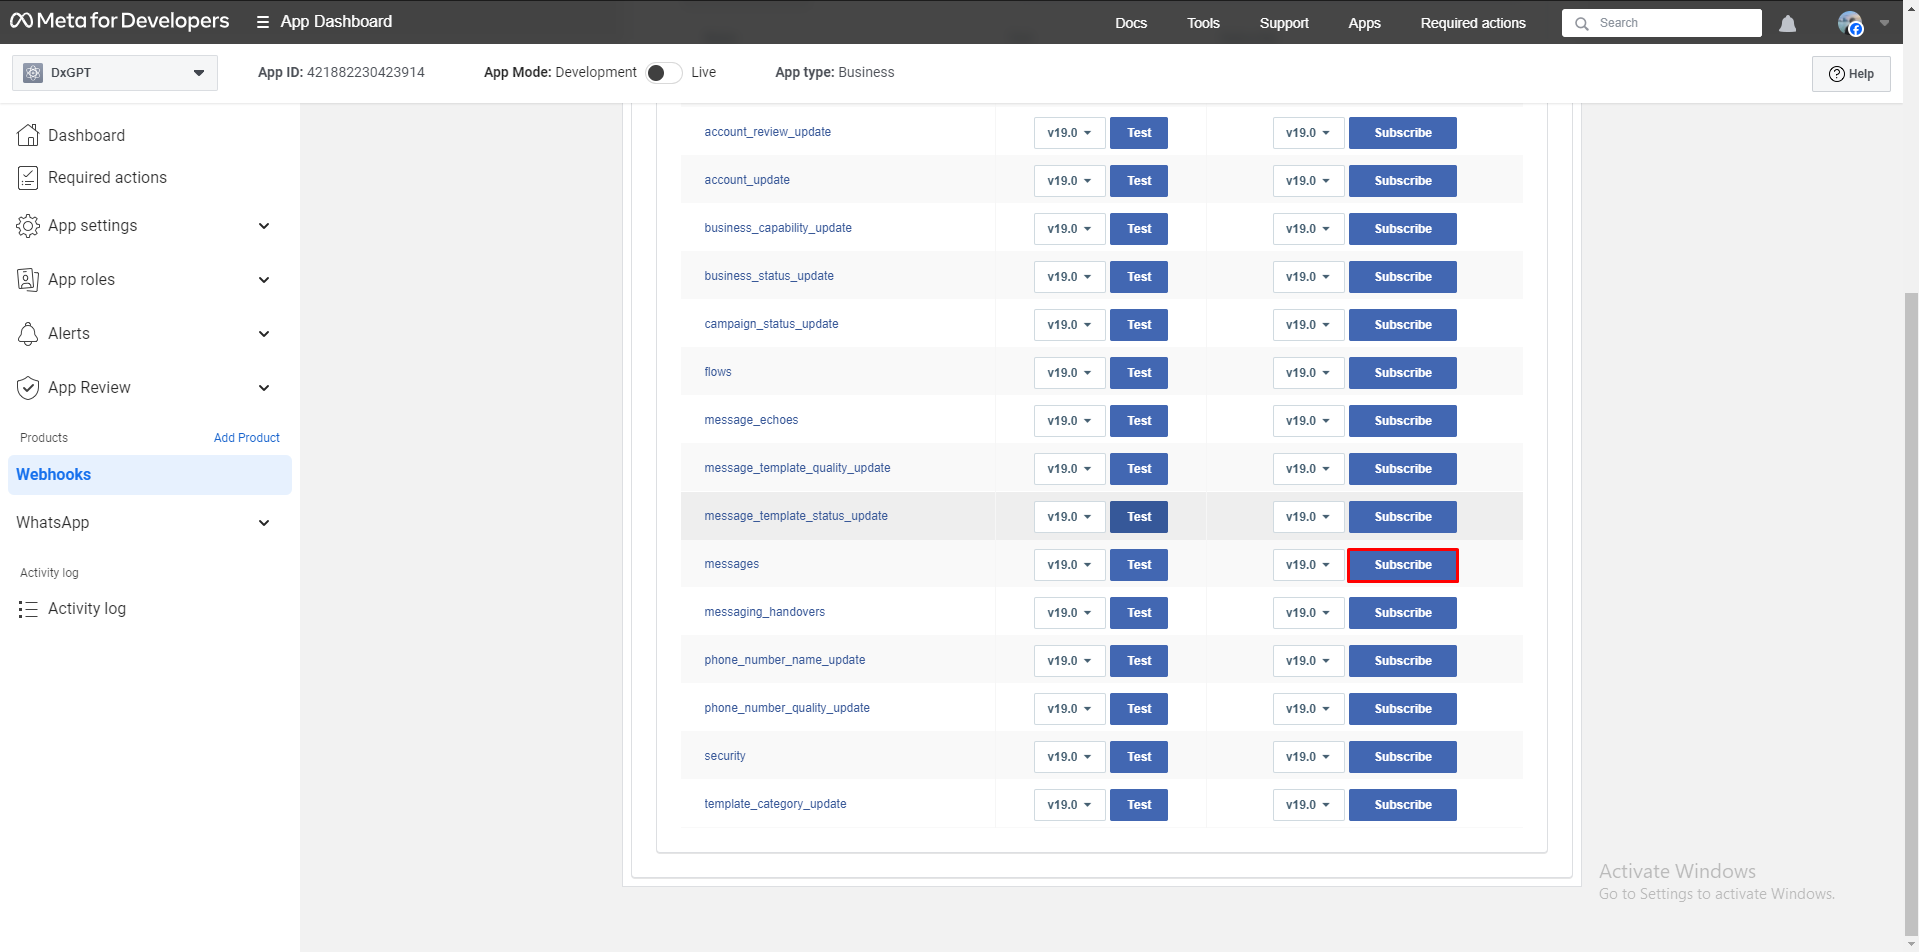
Upon completing these steps, your users can text the phone number and your AI Assistant will reply. 🎉
As a final verification of your integration, send a text message to the WhatsApp number you just connected. You should get a reply from your AI Assistant and the conversation should appear in the Inbox in the DxConnect App.