Website
Overview
In this guide, we'll go through how to integrate your AI Assistant to your website. Here's an overview of what we'll cover:
- How to get the embed script and set white list domains
- How to pass custom user's data to the chatbot
- How to customize the look and feel of your widget
1. How to get the embed script and set white list domains
-
Navigate to the Integrations tab in your account and Click on Personal Website.
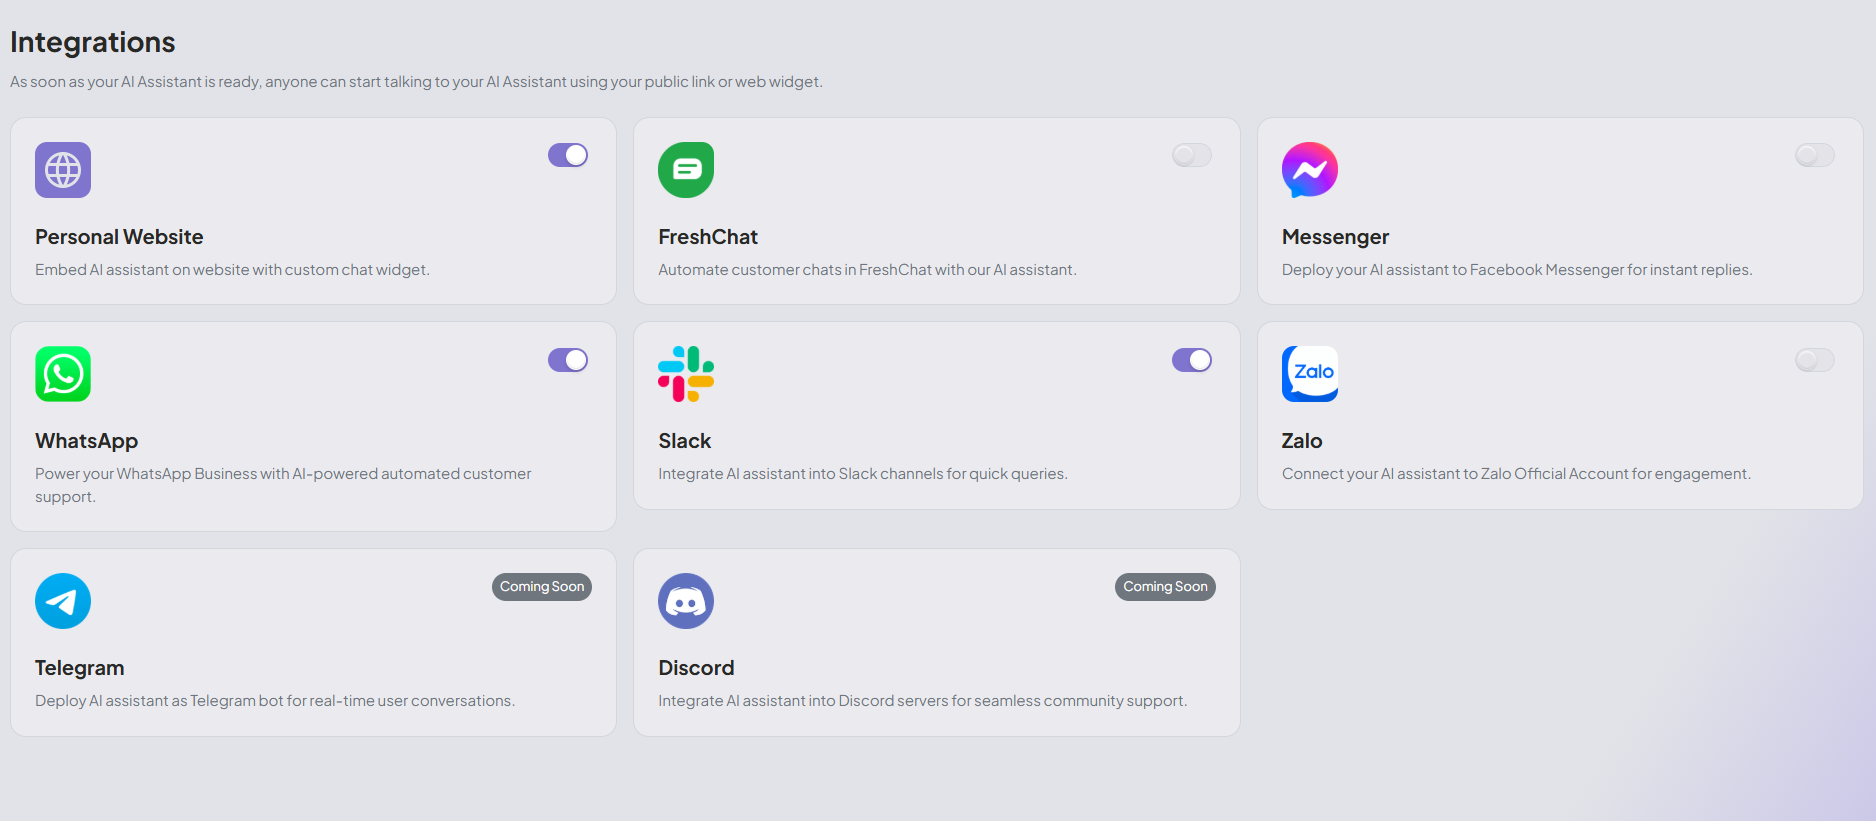
-
Click on Enabled and Copy icon.
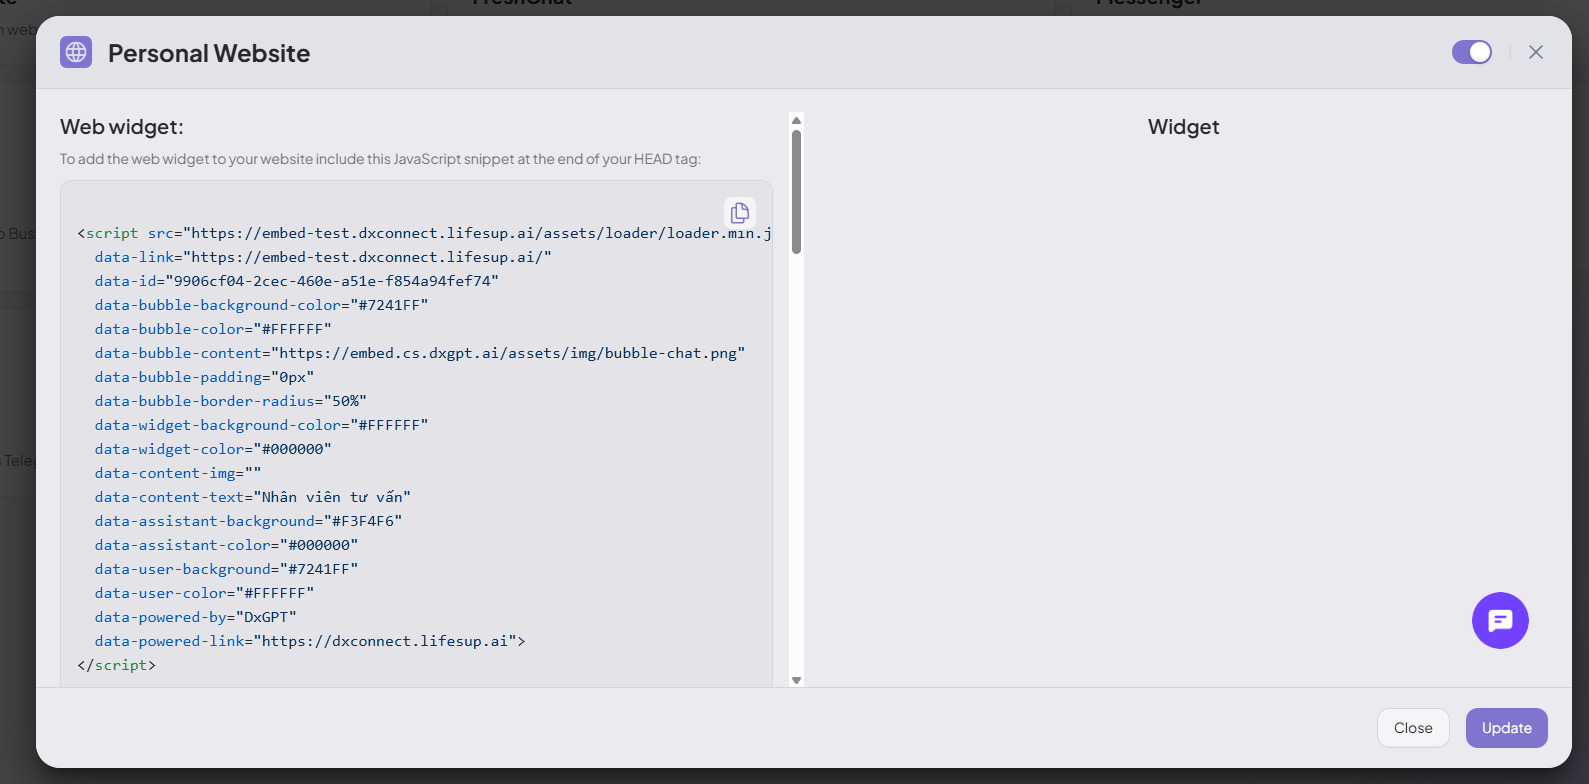
-
Put this script at the end of your <head> tag on your site.
-
Navigate to the Settings tab and open Widget configuration section
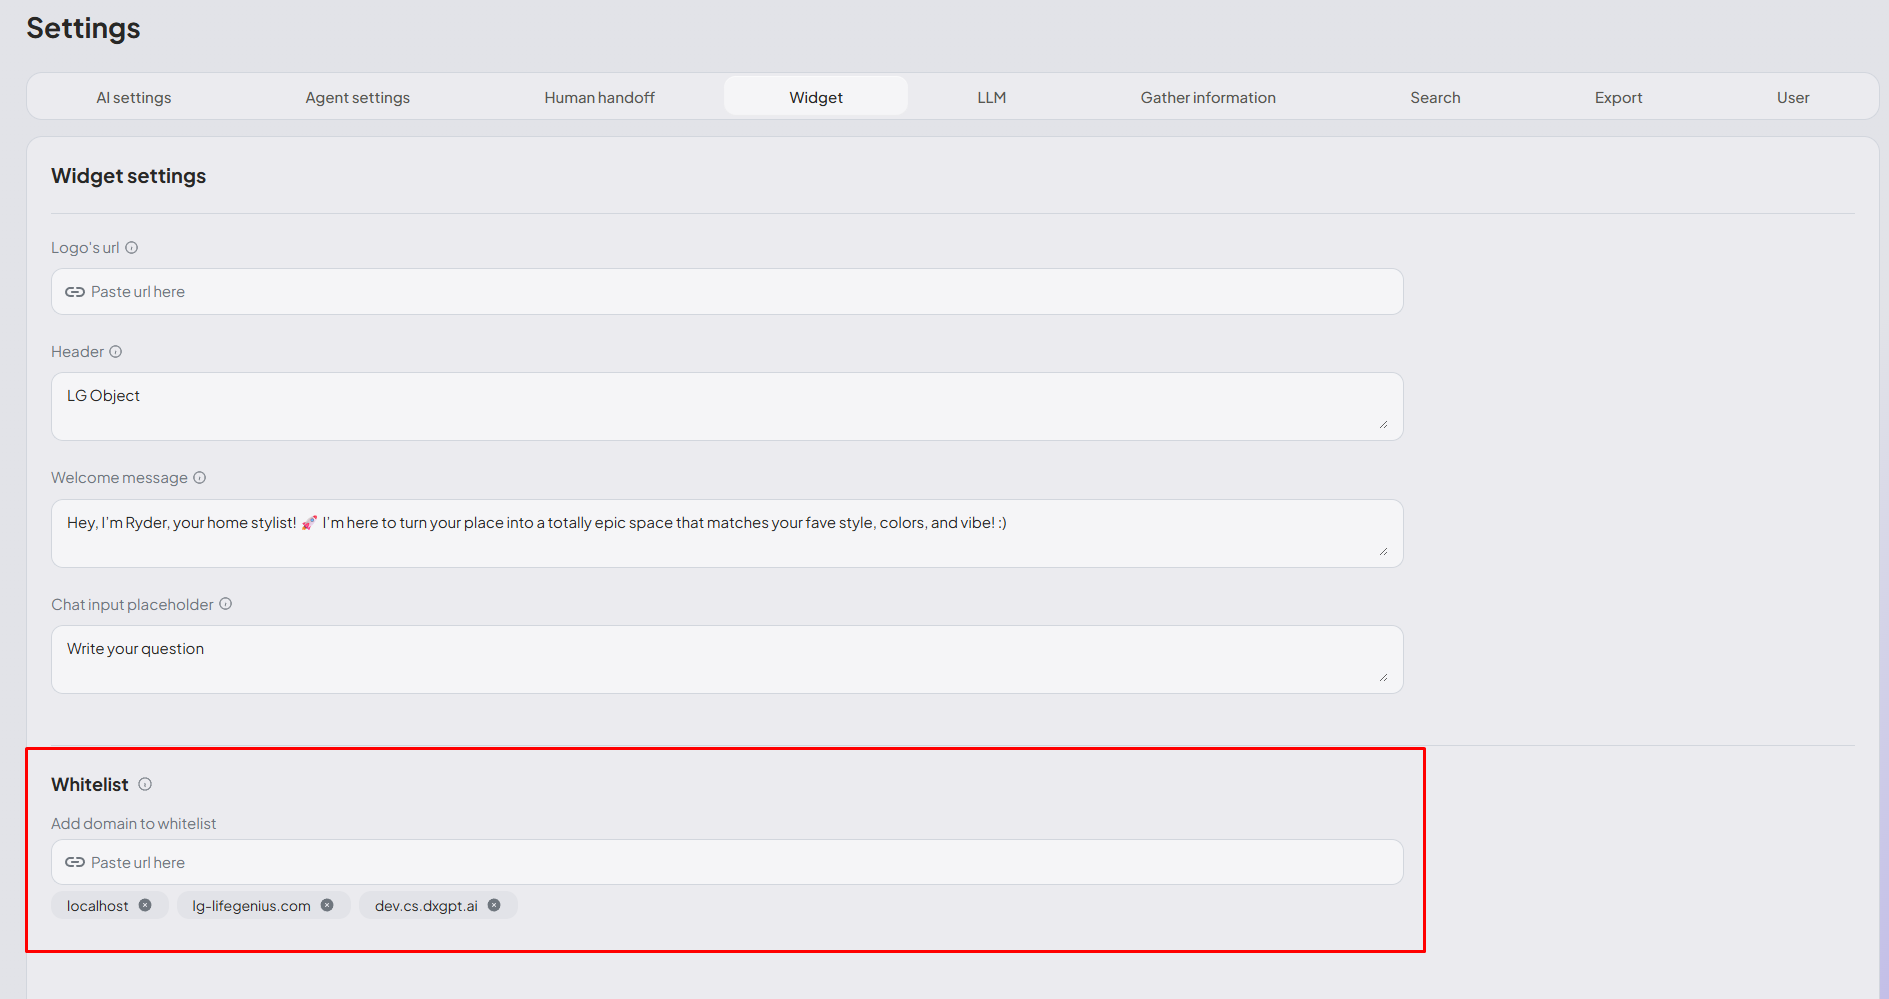
-
Type list of domains that are allowed to embed your widget
Only these sites can embed and chat with your AI Assistant
To ensure functionality, the chat widget must be integrated exclusively with the specified primary domain name. Inclusion of any subdomains necessitates their explicit addition to the configuration settings.
2. How to pass custom user's data to your browser
In specific use cases, such as authorization or API interactions, it may be necessary to utilize the current user's data. We provide a method named setUser() that allows you to transmit this data, enabling subsequent utilization within your API.
Here is an example of the implementation demonstrating the usage of the method setUser():
<script>
    window.onload = function () {
        const queryString = window.location.search;
        const urlParams = new URLSearchParams(queryString);
        const entries = urlParams.entries();
        let user = {};
        for (const entry of entries) {
            user[entry[0]] = entry[1];
        };
        window.setUser(user);
    }
</script>
3. How to customize the look and feel of your widget
You can customize the look and feel of your widget to match your preferences by following these steps:
-
Navigate to the Integrations tab in your account and click on Embed on your website.
-
In the dialog that opens, scroll down to the Bubble custom and Widget custom sections.
Any changes in these sections will be reflected in the embedding script. You will need to re-copy the script and update it on your site.